ryobi pressure washer 3100 psi manual

Welcome to the Ryobi 3100 PSI Pressure Washer Manual, your comprehensive guide to understanding and operating this powerful cleaning tool․ Designed for both professionals and homeowners, this manual provides detailed instructions, safety tips, and maintenance advice to ensure optimal performance and longevity of your pressure washer․

1․1 Overview of the Ryobi 3100 PSI Pressure Washer

The Ryobi 3100 PSI Pressure Washer is a powerful, gas-powered cleaning tool designed for heavy-duty tasks․ With its robust engine and high-pressure output, it efficiently tackles tough dirt, grime, and stains on various surfaces․ Ideal for driveway cleaning, deck maintenance, and exterior wall washing, this model combines durability and reliability․ Its compact design and user-friendly interface make it accessible for both professionals and homeowners․ The washer also features adjustable pressure settings and a range of nozzle options for customized cleaning solutions․

1․2 Importance of Reading the Manual

Reading the Ryobi 3100 PSI Pressure Washer manual is crucial for safe and effective operation․ It provides essential safety precautions, step-by-step assembly instructions, and maintenance tips to extend the product’s lifespan․ The manual also helps users troubleshoot common issues and understand warranty terms․ By following the guidelines, you ensure optimal performance, avoid potential hazards, and maintain the unit’s efficiency․ Proper usage, as outlined in the manual, is key to achieving the best cleaning results while protecting your investment in the pressure washer․

Key Features and Specifications of the Ryobi 3100 PSI Pressure Washer

The Ryobi 3100 PSI Pressure Washer features a powerful engine, durable pump, and high-pressure hose for efficient cleaning․ It includes multiple nozzle tips and detergent injection capability, ensuring versatility for various tasks․ Built for reliability and portability, this unit is designed to handle heavy-duty cleaning jobs with ease and precision․

2․1 Technical Specifications

The Ryobi 3100 PSI Pressure Washer features a powerful 3100 PSI output, driven by a reliable gasoline-powered engine․ It delivers a flow rate of 2․3 GPM, ensuring efficient cleaning for heavy-duty tasks․ The unit includes a durable axial cam pump and a 25-foot high-pressure hose for extended reach․ Weighing approximately 65 pounds, it is built with a sturdy steel frame for durability․ The engine features low-oil shutdown for protection and is EPA and CARB-compliant for environmental safety․

2․2 Included Accessories

The Ryobi 3100 PSI Pressure Washer comes with essential accessories to enhance your cleaning experience․ It includes a 25-foot high-pressure hose for extended reach, a professional-grade spray gun with a 36-inch lance, and a detergent tank for convenient cleaning solutions․ Additionally, it features 5 quick-connect nozzles (15°, 25°, 40°, 60°, and low-pressure soap nozzle) for various cleaning tasks․ The unit also includes a wheel kit for easy mobility and a 1-foot rubber hose for connections․

2․3 Compatibility with Additional Attachments

The Ryobi 3100 PSI Pressure Washer is designed to work seamlessly with a variety of attachments to enhance its functionality․ It is compatible with rotary brushes, surface cleaners, and extension wands, allowing for more efficient cleaning on large surfaces, decks, and driveways․ Additionally, it supports chemical injectors for applying detergents or other cleaning solutions․ Always ensure that any additional attachments are Ryobi-approved to maintain compatibility and warranty coverage․ Using non-compatible accessories may void the warranty or damage the unit․

Safety Precautions and Guidelines

Always wear protective gear, including gloves and goggles, when operating the Ryobi 3100 PSI Pressure Washer․ Avoid spraying at people, pets, or sensitive surfaces․ Keep children away and ensure the area is clear of obstacles․ Never use the pressure washer near open flames or sparks․ Follow all safety guidelines to prevent accidents and ensure safe operation․

3․1 General Safety Guidelines

Always wear protective gear, including gloves and goggles, when operating the Ryobi 3100 PSI Pressure Washer․ Avoid spraying at people, pets, or sensitive surfaces․ Keep children away and ensure the area is clear of obstacles․ Never use the pressure washer near open flames or sparks․ Avoid operating in wet conditions or on uneven surfaces․ Proper footwear is essential to prevent slipping․ Never leave the unit unattended while in operation․ Follow all safety guidelines to prevent injuries and ensure safe, effective cleaning․ Always prioritize caution when handling high-pressure equipment․

3․2 Specific Warnings and Cautions

Never aim the nozzle at windows, doors, or fragile surfaces, as high pressure may cause damage․ Avoid using the pressure washer near electrical outlets or appliances to prevent shock hazards․ Do not operate the unit in enclosed spaces without ventilation, as carbon monoxide buildup can occur․ Keep the spray nozzle at least 12 inches away from surfaces to avoid excessive wear․ Never modify or tamper with the equipment, as this voids the warranty and poses safety risks․ Always turn off the engine and allow it to cool before storing or servicing․ Be cautious of hot surfaces and moving parts during operation․

3․3 Protective Gear Recommendations

Always wear safety glasses or goggles to protect your eyes from debris․ Use closed-toe shoes or boots to prevent foot injuries․ Gloves are recommended to improve grip and reduce vibration fatigue․ Avoid loose clothing that could get caught in moving parts․ Keep long hair tied back to prevent accidental entanglement․ Ensure proper ventilation when using cleaning solutions by wearing a mask․ Protective gear is essential to minimize risks and ensure safe operation of the Ryobi 3100 PSI pressure washer․

Assembly and Initial Setup

Welcome to the assembly and initial setup section․ Carefully unpack all components, verify the inventory, and follow the manual’s step-by-step instructions for proper assembly․ Ensure all connections are secure to avoid leaks or damage․ After assembly, perform a test run to check for leaks and proper function before first use․

4․1 Unpacking and Inventory of Components

Begin by carefully unpacking the Ryobi 3100 PSI Pressure Washer from its box․ Lay out all components on a flat surface for easy identification․ Check for the pressure washer unit, hose, spray gun, nozzles, detergent tank, and any additional accessories․ Refer to the parts list in the manual to ensure no items are missing or damaged․ Inspect each component for signs of wear or damage․ Organize the parts methodically to avoid confusion during assembly․ A well-organized setup ensures a smoother and more efficient assembly process․

4․2 Step-by-Step Assembly Instructions

Attach the handle to the main unit by aligning the bolts and tightening securely․ Connect the high-pressure hose to both the pump and spray gun, ensuring a tight seal․ Install the desired nozzle by twisting it onto the spray gun until it clicks․ Attach the detergent tank to the designated holder on the unit․ Finally, perform a quick inspection to ensure all connections are secure and properly aligned․ This step-by-step process ensures your pressure washer is ready for safe and effective operation․

4․3 Initial Test Run

After assembling your Ryobi 3100 PSI pressure washer, perform an initial test run to ensure proper function․ Start by turning on the engine and allowing it to run for a few minutes․ Check for any leaks in the hoses or connections․ Test the spray gun by squeezing the trigger and adjusting the pressure settings․ Ensure the nozzle rotates smoothly and water flows consistently․ If everything operates as expected, proceed to clean a small, non-critical surface to confirm performance․ Address any issues before full-scale use to ensure reliability and safety․

Operating Instructions

This section provides essential steps for operating the Ryobi 3100 PSI pressure washer, including starting the unit, adjusting pressure settings, using attachments, and proper shutdown procedures safely․

5․1 Starting the Pressure Washer

To start the Ryobi 3100 PSI pressure washer, ensure the oil and fuel levels are adequate․ Connect the high-pressure hose and gun securely․ Choose the appropriate nozzle for your task․ Prime the pump if necessary, then pull the recoil starter or engage the electric start․ Allow the engine to warm up briefly before adjusting the pressure․ Always wear protective gear, including safety goggles and gloves, to ensure safe operation․ Refer to the manual for specific startup procedures to avoid damage or injury․

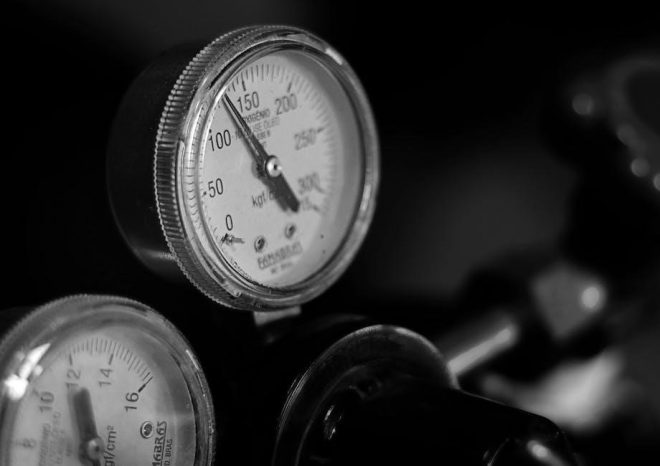
5․2 Adjusting Pressure Settings

To adjust the pressure settings on your Ryobi 3100 PSI pressure washer, locate the pressure regulator knob on the pump․ Turn the knob clockwise to increase pressure or counterclockwise to decrease it․ Always use the correct nozzle for your task, as this affects output pressure․ For lighter jobs, a wider-angle nozzle (e․g․, 25° or 40°) delivers lower pressure, while narrower nozzles (e․g․, 15° or 0°) provide higher pressure for tough cleaning tasks․ Monitor the pressure gauge to ensure settings remain within the recommended range for optimal performance and safety․

5․3 Using Different Nozzles and Attachments

The Ryobi 3100 PSI pressure washer comes with interchangeable nozzles designed for various cleaning tasks․ The 25°, 15°, and 0° nozzles provide high-pressure streams for heavy-duty cleaning, while the 40° and 65° nozzles are ideal for lighter tasks like washing vehicles or sidewalks․ Attachments like the turbo nozzle enhance efficiency for tough stains, while the soap nozzle allows for detergent application․ Always select the correct nozzle for your task to ensure safety and optimal results․ Regularly inspect and clean nozzles to prevent clogging and maintain performance․

5․4 Shutting Down the Unit

To shut down the Ryobi 3100 PSI pressure washer, first turn off the engine and allow it to cool slightly․ Engage the pressure relief valve to release any remaining pressure in the system․ Disconnect the high-pressure hose from the pump and drain any remaining water․ Store the unit in a dry, well-ventilated area, away from direct sunlight․ For winter storage, drain all fluids and apply a storage preservative to protect the engine․ Always refer to the manual for specific storage instructions to ensure longevity․

Maintenance and Troubleshooting

Regular maintenance ensures optimal performance and longevity of the Ryobi 3100 PSI pressure washer․ Troubleshooting common issues like clogs or leaks can prevent major repairs and downtime․

6․1 Regular Maintenance Schedule

Regular maintenance is crucial for the optimal performance and longevity of your Ryobi 3100 PSI pressure washer․ Inspect hoses and connections for damage or leaks before each use․ Replace worn or damaged O-rings and seals to prevent water loss․ Check the oil level in the pump and top it off as needed․ Clean or replace the inlet filter monthly to ensure proper water flow․ After each use, drain the hose and spray gun to prevent water stagnation․ For long-term storage, winterize the unit by draining all water and adding a pump preserver․ Adhere to this schedule to maintain efficiency and avoid costly repairs․

6․2 Common Issues and Solutions

Common issues with the Ryobi 3100 PSI pressure washer include low pressure, leaks, or engine difficulties․ For low pressure, check the inlet filter for blockages or ensure the correct nozzle is used․ Leaks often stem from worn O-rings or loose connections; replace or tighten them as needed․ If the engine won’t start, inspect the fuel for freshness and ensure the spark plug is clean or replaced․ Overheating can occur from prolonged use; allow the unit to cool before resuming․ Refer to the manual for specific troubleshooting steps and genuine replacement parts to resolve these issues effectively․

6․3 Winterizing the Pressure Washer

Winterizing your Ryobi 3100 PSI pressure washer is crucial to maintain its performance and longevity․ Start by draining all water from hoses and the pump to prevent freezing․ Use a drain valve or tilt the unit to remove excess water․ Add a high-quality RV or marine antifreeze to protect internal components from frost damage․ Stabilize the fuel by adding a fuel stabilizer or draining the tank․ Disconnect the spark plug and spray silicone-based lubricant on metal parts to prevent rust․ Store hoses properly, avoiding kinks, and keep the unit in a dry, protected area․ Follow these steps to ensure your pressure washer remains in top condition for the next season․

Parts and Accessories

Explore the range of genuine Ryobi parts and accessories designed for the 3100 PSI pressure washer, including replacement hoses, nozzles, brushes, and detergent tanks․

7․1 Replacement Parts Availability

Replacement parts for the Ryobi 3100 PSI pressure washer are widely available through authorized dealers, home improvement stores, and online retailers․ Genuine Ryobi parts ensure optimal performance and longevity․ Users can find components like hoses, nozzles, and pumps by referencing the manual’s parts list․ Online marketplaces such as Amazon and eBay also offer compatible accessories․ For convenience, Ryobi’s official website provides a “Where to Buy” tool to locate nearby retailers․ Always verify part numbers to ensure compatibility with your model․

7․2 Recommended Accessories for Enhanced Performance

To maximize the efficiency of your Ryobi 3100 PSI pressure washer, consider adding high-quality accessories․ A turbo nozzle is ideal for heavy-duty cleaning tasks, while a rotary nozzle offers wide coverage for large surfaces․ Extend your reach with a 50-foot high-pressure hose or an adjustable spray wand․ Surface cleaners are perfect for decks and driveways, and a brush attachment is great for delicate surfaces like vehicles․ Detergent injectors ensure proper chemical application, and a maintenance kit with oil and seals keeps your unit in top condition․ These accessories enhance versatility and cleaning power․

Warranty Information

The Ryobi 3100 PSI Pressure Washer is backed by a limited 3-year warranty covering defects in materials and workmanship, excluding normal wear and tear for optimal performance and customer satisfaction․

8․1 Warranty Coverage Details

The Ryobi 3100 PSI Pressure Washer is protected by a 3-year limited warranty, covering defects in materials and workmanship from the original purchase date․ This warranty applies to the unit and its original components, excluding wear and tear items like nozzles and seals․ Repairs or replacements are provided free of charge for valid claims, ensuring reliable performance and customer satisfaction․ Proper maintenance and adherence to guidelines are essential to uphold warranty coverage․

8․2 Filing a Warranty Claim

To file a warranty claim for your Ryobi 3100 PSI Pressure Washer, visit the official Ryobi website and navigate to the warranty section․ Register your product and provide proof of purchase․ Contact Ryobi customer support via phone or email to initiate the claim process․ Be prepared to provide the model number, serial number, and a detailed description of the issue․ If approved, Ryobi will repair or replace the defective unit, ensuring minimal downtime and continued satisfaction with your pressure washer․

Environmental Considerations

Use eco-friendly detergents and follow local regulations to minimize environmental impact․ Properly dispose of waste and chemicals to protect ecosystems and water sources․

9․1 Eco-Friendly Usage Tips

To minimize environmental impact, use biodegradable detergents and avoid harsh chemicals․ Always follow recommended dilution ratios to prevent water contamination․ Use the correct nozzle size to reduce water consumption and avoid over-spraying․ Regularly maintain the pressure washer to prevent leaks and ensure efficient operation․ Clean surfaces on permeable areas to avoid runoff into waterways․ Additionally, use the lowest pressure setting necessary for the task to conserve energy and water․ These practices help protect the environment while extending the lifespan of your Ryobi 3100 PSI Pressure Washer․

9․2 Proper Disposal of Chemicals and Waste

Always dispose of chemicals and waste responsibly to prevent environmental contamination․ Never pour cleaning solutions or detergents into storm drains or waterways․ Use designated hazardous waste collection facilities for disposing of leftover chemicals․ Empty detergent containers should be rinsed thoroughly and recycled if possible․ Properly dispose of any damaged or worn-out parts, such as hoses or nozzles, through authorized waste management channels․ Follow local regulations and guidelines for environmentally safe disposal practices to protect ecosystems and public health․

Tips for Optimal Use

For best results, start with the widest nozzle setting and gradually adjust as needed․ Always use the correct detergent for your cleaning task to avoid surface damage and ensure efficient cleaning․ Maintain a safe distance from surfaces to prevent wear and tear․ Regularly inspect and clean the nozzle and hose for optimal performance․ Keep the area clear of debris before starting to ensure a smooth cleaning process․ Following these tips will help extend the life of your pressure washer and improve cleaning efficiency․ Properly store the unit after use to maintain its condition․ Refer to the manual for specific guidelines on handling different surfaces and materials․ By adhering to these tips, you can achieve professional-grade cleaning results while protecting your equipment and the environment․ Always prioritize safety and efficiency when operating the Ryobi 3100 PSI Pressure Washer․ Happy cleaning!

10․1 Maximizing Cleaning Efficiency

To maximize cleaning efficiency with your Ryobi 3100 PSI Pressure Washer, start by selecting the appropriate nozzle for the task․ Use the wide fan tip for large areas like driveways and switch to narrower nozzles for tougher stains or detailed work․ Always use the recommended detergent to enhance cleaning power and avoid damaging surfaces․ Maintain a consistent distance from the surface to ensure even cleaning․ Regularly inspect and clear the nozzle and hose for blockages to maintain optimal pressure flow․ By following these tips, you can achieve faster and more effective cleaning results while preserving the longevity of your pressure washer․

10․2 Best Practices for Different Surfaces

When using the Ryobi 3100 PSI Pressure Washer, tailor your approach to the surface․ For concrete, use a wide fan tip at medium pressure to remove dirt without damaging the surface․ For wood surfaces, opt for a narrower nozzle at lower pressure to avoid splintering․ Vinyl siding requires a wide fan tip to clean effectively without etching․ Delicate surfaces like glass or plants should be cleaned with the lowest pressure setting․ Always test a small area first to ensure compatibility and adjust settings as needed for optimal results․

Comparison with Other Pressure Washers

The Ryobi 3100 PSI Pressure Washer stands out among competitors with its high-pressure output and versatile design․ It offers superior cleaning power and durability compared to similar models, making it a top choice for both residential and light commercial use․ Its ergonomic design and user-friendly features set it apart from other brands, providing a seamless cleaning experience․ With its robust construction and reliable performance, the Ryobi 3100 PSI is a strong contender in the pressure washer market․

11․1 vs․ Similar Models in the Market

The Ryobi 3100 PSI Pressure Washer is a strong competitor in its class, offering comparable power and features to other high-end models․ While it may not exceed top-tier commercial washers in durability, its cost-effectiveness and user-friendly design make it a favorite among homeowners and professionals alike․ Compared to brands like Briggs & Stratton or Generac, the Ryobi model often excels in portability and ease of use, while maintaining similar cleaning efficiency․ Its robust engine and versatile nozzle options further enhance its appeal, making it a standout choice for diverse cleaning tasks․

Frequently Asked Questions

Common questions include topics like assembly, maintenance, and troubleshooting․ Users often inquire about compatibility with attachments and best practices for different cleaning tasks․ This section provides clear answers to ensure optimal use and longevity of the Ryobi 3100 PSI Pressure Washer, addressing both routine care and common issues encountered during operation․

12․1 Common Queries About the Ryobi 3100 PSI

Users often ask about assembly steps, maintenance tips, and troubleshooting common issues․ Queries include questions about starting the unit, adjusting pressure settings, and resolving low water flow․ Many also inquire about compatible attachments and how to winterize the pressure washer․ Additionally, questions arise about eco-friendly usage and best practices for cleaning different surfaces․ This section addresses these concerns, ensuring users can resolve issues quickly and optimize their cleaning experience with the Ryobi 3100 PSI․

13․1 Final Thoughts on the Ryobi 3100 PSI Manual

This manual serves as a comprehensive guide for the Ryobi 3100 PSI Pressure Washer, offering detailed insights into its operation, maintenance, and troubleshooting․ By following the outlined instructions, users can ensure optimal performance, safety, and longevity of their unit․ Whether you’re a professional or a homeowner, this manual provides the essential knowledge needed to maximize efficiency and effectiveness․ Refer back to it regularly for tips on troubleshooting, maintenance, and getting the most out of your Ryobi 3100 PSI Pressure Washer․

qld fish size limits pdf

Queensland fish size limits regulate recreational and commercial fishing to ensure sustainable practices. These limits include minimum and maximum sizes to protect fish populations and maintain ecological balance. Anglers can access detailed guidelines through the official QLD Fish Size Limits PDF or the Qld Fishing 2.0 app for accurate information.

1.1 Minimum and Maximum Size Limits

Queensland imposes minimum and maximum size limits to protect fish populations and promote sustainable fishing practices. Minimum size limits ensure fish reach maturity before being harvested, while maximum limits prevent overfishing of larger species. For example, barramundi must be at least 58cm, with a maximum of 120cm, while Australian bass require a minimum size of 30cm. Some species, like Australian lungfish, are protected and cannot be taken. These limits apply to both recreational and commercial fishing. Correct measurement techniques are essential, such as measuring garfish from the tip of the upper jaw to the tail end. Adhering to these limits helps conserve fish stocks and maintain ecological balance. Detailed size restrictions are outlined in the QLD Fish Size Limits PDF and the Qld Fishing 2.0 app for easy reference.

1.2 Bag and Possession Limits Explained

Bag and possession limits in Queensland are designed to prevent overfishing and ensure sustainable fish populations. A bag limit refers to the maximum number of fish a person can legally catch and keep in one day. Possession limits, on the other hand, include all fish an individual has in their possession, even those stored at home. For example, coral reef fin fish have a combined bag limit of 5 per species, while some species like Australian lungfish are protected and cannot be taken. Exceeding these limits can result in penalties, including fines and loss of fishing gear. These restrictions apply to both recreational and commercial fishing sectors, with specific guidelines detailed in the QLD Fish Size Limits PDF and the Qld Fishing 2.0 app for easy reference.

How to Measure Fish Correctly

Accurate fish measurement is crucial for compliance with size limits. Measure from the tip of the upper jaw to the end of the tail for garfish and whiptail. Use a rigid tool for precise measurements to ensure adherence to regulations.

2.1 Measurement Techniques for Accuracy

Accurate fish measurement is essential to comply with size limits. For most species, measure from the tip of the upper jaw to the end of the tail. Garfish are measured from the upper jaw tip to the tail end, while whiptail is measured to the shorter tail’s end. Use a rigid, straight tool like a ruler or measuring tape to ensure precision. Lay the fish flat on a stable surface to avoid curvature, which can lead to inaccurate readings. Refer to the official QLD Fish Size Limits PDF for species-specific guidelines. Correct measurement helps conserve fish populations and ensures fair enforcement of regulations. Always verify your technique to avoid penalties for undersized catches.

2.2 Tools and Methods for Fish Measurement

Accurate fish measurement requires the right tools and techniques. Use a rigid measuring tape, ruler, or purpose-built fish measuring device to ensure precision. Lay the fish flat on a stable surface to prevent curvature, which can distort measurements. For most species, measure from the tip of the upper jaw to the end of the tail. Garfish are measured from the tip of the upper jaw to the tail’s end, while whiptail is measured to the shorter tail’s tip. Ensure the fish is aligned straight to avoid inaccurate readings. Refer to the QLD Fish Size Limits PDF for species-specific guidelines. Proper measurement methods help enforce size limits effectively and contribute to sustainable fishing practices. Always double-check your measurements to ensure compliance with regulations.

Specific Species Size Limits

QLD size limits vary by species, such as Barramundi (58cm min, 120cm max) and Coral Reef Fin Fish, ensuring sustainable fishing practices and species protection.

3.1 Barramundi Size Regulations

In Queensland, Barramundi have specific size regulations to ensure sustainable fishing. The minimum size limit is set at 58 cm, while the maximum size limit is 120 cm. However, one Barramundi over 120 cm can be retained per person. These limits apply to all Queensland waters, including freshwater and tidal areas. The regulations are designed to protect juvenile fish and allow them to reach maturity before being harvested. Additionally, there is a daily catch limit of 5 Barramundi per person, with exceptions in certain closed seasons or specific waterways. Adhering to these regulations helps maintain healthy Barramundi populations and supports the long-term sustainability of the species. Anglers are encouraged to consult the official QLD Fish Size Limits PDF or the Qld Fishing 2.0 app for the most up-to-date information.

3.2 Coral Reef Fin Fish Size Restrictions

Coral reef fin fish in Queensland are subject to specific size restrictions to protect these vital marine species. The minimum size limit for most coral reef fin fish is 35 cm, while some species, such as Coral Trout, have a higher minimum size of 38 cm. Maximum size limits also apply to certain species to prevent overfishing. For example, Coral Trout and Sweetlip have a maximum size limit of 80 cm, while Snapper have a 35 cm minimum limit. A combined bag limit of 5 coral reef fin fish per person applies, with no more than 3 of any one species. Additionally, annual closures during spawning seasons further protect these fish. Anglers must measure fish accurately and adhere to these restrictions to support sustainable fishing practices. Detailed guidelines are available in the QLD Fish Size Limits PDF or through the Qld Fishing 2.0 app.

Possession and Bag Limits

Queensland’s possession and bag limits ensure sustainable fishing practices. A possession limit is the total number of fish one person can legally keep at any time, while bag limits restrict the daily catch. These rules help maintain healthy fish populations.

4.1 Understanding Daily Catch Limits

Daily catch limits in Queensland are designed to ensure sustainable fishing practices by restricting the number of fish that can be caught and kept each day. These limits vary by species and are often combined with possession limits, which apply to the total number of fish an individual can possess at any time. For example, snapper and coral reef finfish have specific daily catch limits to prevent overfishing. Understanding these limits is crucial for recreational and commercial fishers to comply with regulations and contribute to the conservation of marine resources. The Queensland Fisheries Regulation 2008 and the QLD Fishing 2.0 app provide detailed information on species-specific limits, ensuring anglers can make informed decisions while fishing responsibly in Queensland waters.

4.2 Aggregate Bag Limits for Multiple Species

Aggregate bag limits in Queensland apply when fishing for multiple species, capping the total number of fish that can be caught and kept. These limits ensure sustainable fishing practices by preventing overfishing of any single species. For example, unlisted scale-bearing fish have a bag limit of five per species, with a maximum of 20 fish in total allowed to be weighed in. This approach encourages responsible fishing by distributing catch across different species. Anglers must adhere to these limits to avoid penalties and support conservation efforts. Detailed information on aggregate bag limits can be found in the official QLD Fish Size Limits PDF or through the Qld Fishing 2.0 app, ensuring compliance with up-to-date regulations.

Gear Restrictions and Regulations

Queensland fishing regulations specify permitted gear, including lines, hooks, and traps, while prohibiting nets and dynamite to prevent overfishing. Adhering ensures sustainable fish populations.

5.1 Permitted Fishing Gear and Equipment

In Queensland, permitted fishing gear includes handlines, rods, and reels, with restrictions on the number of hooks per line. Traps and nets are allowed under specific conditions, ensuring they meet size and material requirements to minimize bycatch. Gear must comply with regulations to avoid harming protected species or ecosystems. For example, traps must have rigid entrances and mesh sizes no larger than 25mm. These guidelines ensure sustainable fishing practices while allowing recreational and commercial fishers to operate effectively. Always consult the QLD Fishing 2.0 app or official guides for the most current equipment regulations.

5.2 Prohibited Gear to Prevent Overfishing

Queensland prohibits certain fishing gear to prevent overfishing and protect marine life. Nets with mesh sizes smaller than specified limits are banned to avoid catching undersized fish. Traps made from non-rigid materials or with entrance openings exceeding 10cm are also prohibited. Additionally, gear that can cause habitat destruction, such as dredges or certain types of trawling equipment, is restricted. These prohibitions aim to balance sustainable fishing practices with environmental conservation. Fishers must adhere to these regulations to avoid penalties and support the long-term health of fish populations. Always refer to the QLD Fish Size Limits PDF or the Qld Fishing 2.0 app for detailed information on prohibited gear.

Closed Seasons and Protected Areas

Closed seasons protect fish during spawning, while marine protected areas safeguard critical habitats. These measures ensure fish populations remain healthy and ecosystems thrive. Check the QLD guide for details.

6.1 Seasonal Closures for Fish Spawning

Seasonal closures are implemented to protect fish during their spawning periods, ensuring the sustainability of fish populations. These closures apply to specific species and locations, such as coral reef fin fish, which are protected during their spawning seasons. For example, coral reef fin fish are closed from midnight on October 1 and November 20, respectively, to safeguard their reproductive cycles. Similarly, spanner crab fishing is closed annually from November 20 to December 20 to allow stocks to replenish. These closures are vital for maintaining healthy fish populations and preventing overfishing. Anglers must adhere to these restrictions to support conservation efforts. Detailed information on seasonal closures can be found in the official QLD Fish Size Limits PDF or through the Qld Fishing 2.0 app.

6.2 Marine Protected Areas and Sanctuaries

Marine protected areas and sanctuaries in Queensland are designated to safeguard critical habitats and biodiversity. These areas restrict or prohibit fishing to protect vulnerable species, breeding grounds, and ecosystems. For example, certain zones within the Great Barrier Reef Marine Park are closed to fishing to preserve coral reefs and associated marine life. Similarly, areas like Weipa and Keppel Bay have specific protections to maintain fish stocks and ecological balance. Fishers must adhere to these restrictions to avoid penalties and support conservation. The QLD Fish Size Limits PDF and the Qld Fishing 2.0 app provide detailed maps and information on these protected zones, ensuring anglers can identify and respect these areas while planning their fishing trips.

Penalties for Violations

Violations of QLD fish size limits result in fines and penalties. Possessing undersized fish or exceeding bag limits can lead to significant financial penalties and points deductions.

7.1 Fines and Penalties for Undersized Fish

Fishing in violation of QLD size limits results in significant penalties. Possessing undersized fish can lead to fines, with penalties escalating for repeat offenses. Each undersized fish may incur a 25-point penalty, and exceeding bag limits can result in additional fines. Authorities enforce these measures to ensure sustainable fishing practices and protect fish populations. Recreational and commercial fishers alike are subject to these penalties, emphasizing the importance of adhering to size restrictions. Failure to comply not only harms the environment but also risks legal consequences, including fines and potential loss of fishing privileges. It is crucial for anglers to familiarize themselves with the QLD fish size limits to avoid these penalties and support conservation efforts.

7.2 Consequences of Exceeding Bag Limits

Exceeding QLD bag limits results in legal consequences to ensure sustainable fishing practices. Fishers found with catches exceeding daily or possession limits face fines and penalties. For each fish over the limit, a 25-point penalty may apply, and the excess catch may be confiscated. Repeat offenses can lead to increased fines and potential suspension of fishing privileges. These measures aim to prevent overfishing and protect fish populations. Exceeding bag limits not only harms the environment but also undermines conservation efforts. Anglers must adhere to the specified limits to avoid legal repercussions and contribute to the long-term sustainability of Queensland’s fisheries. Understanding and respecting these regulations is essential for responsible fishing practices.

Accessing the QLD Fish Size Limits PDF

Access the QLD Fish Size Limits PDF via the official Fisheries Queensland website or the Qld Fishing 2.0 app for detailed fishing regulations and updates.

8.1 Downloading the Official Guide

The official QLD Fish Size Limits guide is readily available for download on the Fisheries Queensland website. This comprehensive PDF document provides detailed information on recreational fishing regulations, including minimum and maximum size limits, bag and possession limits, and measurement guidelines. It also outlines specific rules for different fish species and explains how to ensure sustainable fishing practices. Regular updates are made to reflect changes in fishing laws, so downloading the latest version ensures anglers have the most accurate information. The guide is free to access and can be found by visiting the Fisheries Queensland homepage and navigating to the recreational fishing section. This resource is essential for anyone planning a fishing trip in Queensland to stay informed and compliant with local regulations.

8.2 Using the QLD Fishing 2.0 App

The QLD Fishing 2.0 app is a convenient digital tool designed to help anglers stay informed about Queensland’s fishing regulations. Available for free download, the app provides up-to-date information on size and bag limits, closed seasons, and protected areas. It features a user-friendly interface with detailed species profiles, measurement guides, and maps of fishing locations. The app also allows users to record their fishing trips, track catches, and share experiences with fellow anglers. Regular updates ensure that the app reflects the latest changes in fishing laws and regulations. By using the QLD Fishing 2.0 app, recreational fishers can easily access the information they need to comply with Queensland’s fishing rules and contribute to sustainable fishing practices. This digital resource is a must-have for anyone planning a fishing trip in Queensland.

Importance of Adhering to Size Limits

Adhering to QLD fish size limits is crucial for conservation, protecting fish populations, and ensuring sustainable fishing practices that support environmental balance and future fishing opportunities.

9.1 Conservation Goals and Sustainability

Adhering to QLD fish size limits is essential for achieving conservation goals and promoting sustainability. These limits help protect juvenile fish, allowing them to mature and reproduce, ensuring healthy fish populations. By setting minimum and maximum sizes, the ecosystem remains balanced, preventing overfishing and maintaining biodiversity. Bag and possession limits further support sustainability by managing the total catch, preventing depletion of fish stocks. These measures align with broader environmental objectives, safeguarding marine and freshwater ecosystems for future generations. Compliance with size limits demonstrates a commitment to responsible fishing practices, fostering a sustainable future for Queensland’s aquatic resources.

9.2 Ensuring Healthy Fish Populations

QLD fish size limits play a crucial role in maintaining healthy fish populations by protecting juvenile fish, allowing them to reach maturity and reproduce. Minimum size limits prevent the removal of young fish, ensuring sufficient numbers reach breeding age. Maximum size limits, where applied, protect larger, often female fish, which are vital for replenishing populations. These measures help preserve genetic diversity and maintain the balance of marine and freshwater ecosystems. By adhering to size limits, anglers contribute to the long-term stability of fish populations, ensuring their resilience against environmental changes and overfishing pressures. Healthy fish populations are essential for both recreational and commercial fisheries, as well as the overall biodiversity of Queensland’s aquatic environments.

Updates and Changes to Regulations

Queensland fishing regulations are periodically updated to ensure sustainability. Recent changes include new size limits for certain species and adjusted bag limits to conserve fish populations. Stay informed via the QLD Fishing 2.0 app or Fisheries Queensland website for the latest updates;

10.1 Recent Changes in Fishing Laws

Recent updates to Queensland fishing laws include changes to size and bag limits for certain species to enhance sustainability. For example, the minimum legal size for pearl perch increased from 35 cm to 38 cm, while new boat limits were introduced for barramundi to reduce overfishing. Additionally, some inshore species like tailor now have a minimum size limit of 30 cm. These changes aim to balance recreational and commercial fishing practices with conservation goals. Anglers are encouraged to download the QLD Fishing 2.0 app or refer to the official QLD Fish Size Limits PDF for the most current regulations. Regular updates ensure fish populations remain healthy and ecosystems thrive.

10.2 How to Stay Informed About Updates

To stay informed about updates to Queensland fish size limits, anglers can download the QLD Fishing 2.0 app, which provides real-time updates and notifications. The official QLD Fish Size Limits PDF is also available for download from Fisheries Queensland’s website. Regularly checking the Fisheries Queensland website or following their social media channels ensures access to the latest changes. Additionally, subscribing to email newsletters or joining fishing communities can help anglers stay up-to-date. These resources provide detailed information on new regulations, seasonal closures, and species-specific limits, ensuring compliance and sustainable fishing practices.

laxmi ashtotharam pdf

Lakshmi Ashtotharam, also known as Lakshmi Ashtottara, is a sacred hymn comprising 108 Names of Goddess Lakshmi, symbolizing her divine attributes and blessings. Available as a downloadable PDF, it offers an accessible way to connect with the deity, fostering spiritual growth and prosperity.

1.1. What is Lakshmi Ashtotharam?

Lakshmi Ashtotharam is a revered Hindu hymn dedicated to Goddess Lakshmi, comprising 108 sacred names that extol her divine virtues. It is a devotional tool used to invoke her blessings for prosperity, wealth, and spiritual growth. The hymn is often recited during worship and rituals, and its availability in PDF format makes it easily accessible for devotees to chant and reflect upon. It embodies the essence of Goddess Lakshmi’s benevolence and serves as a powerful medium for connecting with her divine energy.

1.2. Significance of the Hymn in Hindu Tradition

Lakshmi Ashtotharam holds profound significance in Hindu tradition as a sacred hymn that embodies Goddess Lakshmi’s divine virtues. It is widely revered for its ability to invoke her blessings, ensuring prosperity, harmony, and spiritual growth. The hymn’s recitation is believed to purify the mind, attract positive energy, and foster a deep connection with the divine. Its availability in PDF format has further enhanced its accessibility, allowing devotees to chant and reflect on its verses with ease, making it an integral part of daily rituals and worship practices.

Historical and Cultural Background

Lakshmi Ashtotharam, an ancient hymn rooted in Hindu scripture, is believed to have originated in the 8th century, composed by Adi Shankaracharya, and remains a cornerstone of worship and devotion, now widely accessible in PDF format.

2.1. Origins and Evolution of the Hymn

Lakshmi Ashtotharam’s origins trace back to ancient Hindu scriptures, with its composition attributed to Adi Shankaracharya in the 8th century. This hymn evolved from Vedic chants, blending devotion and philosophy. Over centuries, it adapted to regional languages and traditions, maintaining its core spiritual essence. The PDF version preserves this legacy, making it accessible for modern worshippers to chant and connect with Goddess Lakshmi’s blessings, ensuring its timeless relevance in Hindu devotion and spiritual practices.

2.2. Role of Lakshmi Ashtotharam in Hindu Worship

Lakshmi Ashtotharam plays a central role in Hindu worship as a devotional tool to invoke Goddess Lakshmi’s blessings for prosperity and wealth. The PDF version simplifies access, enabling devotees to chant the hymn during rituals, festivals, or daily worship. It is often recited during Diwali and other auspicious occasions to attract divine grace. The hymn’s verses, available in Sanskrit with translations, help focus the mind and connect with the goddess, fostering spiritual growth and material well-being. Its widespread use underscores its significance in Hindu religious practices, making it a cherished resource for seekers of both spiritual and material fulfillment.

Structure and Composition

Lakshmi Ashtotharam is structured as a devotional hymn with 108 names, each glorifying Goddess Lakshmi. The PDF version presents these verses in Sanskrit, often accompanied by English translations, ensuring accessibility and reverence in worship.

3.1. The 108 Names of Goddess Lakshmi

The 108 names of Goddess Lakshmi, as detailed in the Lakshmi Ashtotharam PDF, are a profound enumeration of her divine attributes. Each name reflects her roles as the embodiment of wealth, prosperity, and spiritual enlightenment. These names, such as “Srimah” and “Vishnupriya,” highlight her association with Lord Vishnu and her nurturing essence. The PDF format allows devotees to easily access and recite these sacred names, facilitating a deeper connection with the deity and invoking her blessings for material and spiritual well-being.

3.2. Meaning and Interpretation of the Verses

The verses of Lakshmi Ashtotharam, as presented in the PDF, offer a rich tapestry of spiritual and philosophical meanings. Each name and mantra is meticulously crafted to evoke the divine attributes of Goddess Lakshmi, symbolizing prosperity, harmony, and divine grace. The hymn not only praises her eternal beauty and benevolence but also serves as a meditation tool, helping devotees connect with her essence. By chanting these verses, believers seek to harmonize their lives, cultivate inner peace, and attract positive energies, reflecting the deeper purpose of the hymn in Hindu spirituality and worship.

Spiritual Significance

Lakshmi Ashtotharam is a powerful meditation tool, with each name reflecting Goddess Lakshmi’s divine attributes. Chanting the verses fosters harmony, prosperity, and a deep connection to the divine essence.

4.1. Connection to Goddess Lakshmi’s Attributes

The Lakshmi Ashtotharam deeply connects to Goddess Lakshmi’s attributes, such as prosperity, wisdom, and compassion. Each of the 108 names in the PDF reflects her divine qualities, emphasizing her role as the embodiment of wealth and harmony. These verses highlight her eternal presence in all forms, reinforcing her significance as a symbol of consciousness and universal energy. By chanting, devotees align with her attributes, seeking balance and divine grace in their lives.

4.2. Role in Seeking Prosperity and Wealth

Lakshmi Ashtotharam is a powerful tool for seeking prosperity and wealth, as it invokes Goddess Lakshmi’s blessings. Each verse in the PDF highlights her role in granting material abundance and spiritual wealth. Devotees chant these 108 names to attract positive energy, ensuring financial stability and success. The hymn’s verses emphasize faith, focus, and devotion, making it a revered practice for those seeking to enhance their livelihood and attain a balanced life. Its accessibility in PDF format allows widespread use, fostering a deeper connection with Lakshmi’s benevolent grace;

Benefits of Chanting Lakshmi Ashtotharam

Chanting Lakshmi Ashtotharam brings spiritual and material benefits, fostering inner peace and a divine connection. It attracts prosperity, enhances well-being, and strengthens faith in Goddess Lakshmi’s grace.

5.1. Spiritual and Material Benefits

Chanting Lakshmi Ashtotharam offers profound spiritual and material benefits. Spiritually, it deepens one’s connection to Goddess Lakshmi, fostering inner peace and divine grace. Materially, it is believed to attract prosperity, wealth, and good fortune. Regular recitation helps alleviate financial struggles and brings harmony to one’s life; The hymn’s verses are imbued with sacred energy, making it a powerful tool for those seeking both spiritual enlightenment and worldly success. Its chanting is often recommended for individuals desiring balance in their material and spiritual journeys.

5.2. Inner Peace and Divine Connection

Chanting Lakshmi Ashtotharam cultivates profound inner peace and strengthens one’s connection to the divine. It creates a meditative state, allowing devotees to reflect on their spiritual journey and seek harmony within. The hymn’s verses invoke Goddess Lakshmi’s grace, fostering a sense of calm and balance. By focusing on her attributes, individuals can transcend worldly concerns and experience a deeper sense of unity with the universe. This practice not only enriches spiritual life but also nurtures a heart filled with gratitude and devotion, essential for lasting inner tranquility and divine alignment.

The Lakshmi Ashtotharam PDF

The Lakshmi Ashtotharam PDF contains the sacred 108 names of Goddess Lakshmi, offering a convenient and accessible format for worship, prosperity, and spiritual growth. Easily downloadable online, it provides a structured way to connect with the divine, ensuring blessings of wealth and harmony.

6.1. Content and Features of the PDF

The Lakshmi Ashtotharam PDF is a comprehensive resource featuring the 108 sacred names of Goddess Lakshmi, each highlighting her divine attributes. It includes English translations, Sanskrit verses, and interpretations, making it accessible for devotees worldwide. The PDF also contains detailed guides for rituals, chanting techniques, and the significance of each name. Designed for both spiritual seekers and those seeking material prosperity, it offers a structured approach to worship and self-reflection. Its digital format ensures easy accessibility on various devices, making it a valuable tool for modern spiritual practices.

6.2. How to Use the PDF for Worship

To use the Lakshmi Ashtotharam PDF effectively, begin by downloading and printing it for convenience. Find a quiet, sacred space for worship, and recite the 108 names with devotion. Chant each name slowly, focusing on its meaning and spiritual significance. Offer prayers and flowers to Goddess Lakshmi, seeking her blessings for prosperity and peace. Regular chanting enhances spiritual connection and aligns intentions with divine energy. The PDF also serves as a guide for rituals, helping devotees follow traditional practices and deepen their worship experience.

Rituals and Practices

Recite Lakshmi Ashtotharam with devotion, maintaining a clean and sacred environment. Offer flowers and prayers, focusing on Goddess Lakshmi’s blessings for prosperity and peace through the PDF guide.

7.1. Best Time to Chant Lakshmi Ashtotharam

The ideal time to chant Lakshmi Ashtotharam is during early mornings or evenings when the mind is calm. Fridays are considered highly auspicious for invoking Goddess Lakshmi. Ensure a peaceful environment, free from distractions, to maximize the spiritual impact. Chanting during Navratri or Diwali amplifies the benefits, as these periods are sacred for worship. The Lakshmi Ashtotharam PDF often includes guidelines for optimal timing, helping devotees align their practices with divine energies for prosperity and inner harmony.

7.2. Preparations and Rituals for Effective Chanting

For effective chanting of Lakshmi Ashtotharam, purify the space with incense and flowers. Offer worship to Goddess Lakshmi with a focused mind and sincere intent. Bathe before chanting, wear clean clothes, and sit in a tranquil environment. Use the Lakshmi Ashtotharam PDF as a guide for pronunciation and structure. Light a lamp or candle to symbolize divine light. Avoid distractions and maintain concentration to fully immerse in the spiritual experience. Regular practice enhances the connection with Goddess Lakshmi, fostering prosperity and inner peace.

Goddess Lakshmi in Hinduism

Goddess Lakshmi is the embodiment of fortune, prosperity, and wealth, often depicted with four arms, symbolizing her ability to grant boons. She is Lord Vishnu’s consort and resides on his chest as Srivatsa, representing divine grace and balance in the universe.

8;1. Attributes and Forms of Goddess Lakshmi

Goddess Lakshmi embodies fortune, prosperity, and wealth, often depicted with four arms, symbolizing her power to bestow blessings. Her forms include eight manifestations, known as Ashta Lakshmi, representing different aspects of prosperity. She is revered as the consort of Lord Vishnu, residing on his chest as Srivatsa, symbolizing divine grace. Her presence is associated with virtue, peace, and harmony. The lotus, her iconic symbol, signifies spiritual growth, while elephants showering water represent abundance. Lakshmi’s attributes highlight her role in maintaining cosmic balance and fostering a loving, righteous environment.

8.2. Her Role in Maintaining Balance and Harmony

Goddess Lakshmi is revered as the embodiment of balance and harmony, fostering a righteous and peaceful environment. Her presence is believed to thrive in settings where virtue, truth, and compassion prevail. As the consort of Lord Vishnu, she complements his cosmic duties, ensuring equilibrium in the universe. Lakshmi’s attributes promote a loving and harmonious atmosphere, reminding devotees to cultivate these qualities. Her role extends to maintaining cosmic balance, ensuring prosperity and well-being coexist with moral integrity, reflecting her divine essence as a sustainer of harmony in both spiritual and material realms.

Modern Relevance

The Lakshmi Ashtotharam PDF is now widely accessible online, offering devotees a convenient way to chant and reflect on Goddess Lakshmi’s blessings in the digital age.

9.1. Digital Availability and Accessibility

The Lakshmi Ashtotharam PDF is now widely available online, enabling easy access for devotees worldwide. Platforms like Google and spiritual websites offer downloadable versions, ensuring that the hymn reaches a global audience. The digital format allows users to search, download, and chant the verses effortlessly. This accessibility has made it simpler for people to incorporate the hymn into their daily worship routines, fostering a deeper connection with Goddess Lakshmi’s divine energy and blessings. The PDF’s digital presence bridges tradition with modern technology, making ancient spirituality accessible to all.

9.2. Impact of the PDF in Contemporary Worship

The Lakshmi Ashtotharam PDF has revolutionized contemporary worship by making the sacred hymn easily accessible. Devotees can now chant the 108 names of Goddess Lakshmi with convenience, fostering a deeper spiritual connection. The digital format has simplified rituals, allowing individuals to incorporate the hymn into daily worship effortlessly. This accessibility has also enabled global dissemination, ensuring that the tradition remains vibrant in modern times. The PDF’s widespread use underscores its enduring relevance, bridging ancient spirituality with contemporary technology to inspire devotion and prosperity in today’s fast-paced world.

Lakshmi Ashtotharam PDF is a timeless spiritual resource, offering profound connections to Goddess Lakshmi. Its accessibility and relevance continue to inspire devotion, prosperity, and inner peace globally.

10.1. Final Thoughts on Lakshmi Ashtotharam

Lakshmi Ashtotharam is a profound hymn that embodies the essence of devotion to Goddess Lakshmi. Its 108 names encapsulate her divine attributes, offering a pathway to spiritual growth and material prosperity. The availability of the Lakshmi Ashtotharam PDF has made it easily accessible, allowing devotees to chant and reflect on its verses with convenience. This sacred text not only strengthens one’s connection with the divine but also fosters a sense of balance and harmony in life. It remains a timeless guide for those seeking blessings, peace, and fulfillment.

10.2. Encouragement to Explore the PDF

Exploring the Lakshmi Ashtotharam PDF is a rewarding spiritual journey. This digital resource provides easy access to the hymn’s 108 names, enabling devotees to chant and meditate effortlessly. The PDF format ensures clarity and convenience, making it ideal for daily worship or personal reflection. By embracing this resource, individuals can deepen their connection with Goddess Lakshmi, seeking her blessings for prosperity and peace. It is a valuable tool for those striving to integrate spiritual practices into their modern lifestyle, ensuring timeless wisdom remains accessible and relevant.

big dog barf feeding guide

Welcome to the BARF feeding guide, a comprehensive resource for pet owners seeking a natural, biologically appropriate diet for their big dogs. This guide explores the benefits of raw feeding, offering practical advice and essential insights to ensure your dog thrives on a balanced, nutrient-rich diet.

What is the BARF Diet?

The BARF Diet, an acronym for Biologically Appropriate Raw Food, is a feeding approach that mirrors a dog’s natural diet. It consists of raw meat, bones, organs, and some fruits and vegetables, aiming to provide essential nutrients as dogs would consume in the wild. Typically, the diet is composed of 70% muscle meat, 10% raw edible bones, and smaller portions of organs and vegetables. This approach is designed to promote health and well-being by aligning with a dog’s evolutionary needs. For big dogs, the BARF Diet is tailored to their size and energy levels, ensuring proper nutrition while minimizing risks through high-quality ingredients and safe handling practices.

Benefits of BARF Feeding for Big Dogs

BARF feeding offers numerous benefits for big dogs, improving overall health and well-being. It enhances digestion by providing easily absorbable nutrients, reducing the risk of allergies and digestive disorders. A raw diet promotes healthier skin and a shinier coat, while boosting energy levels for active lifestyles. By eliminating processed ingredients, BARF feeding can reduce inflammation and support joint health, crucial for larger breeds. Additionally, raw bones contribute to better dental health, reducing tartar buildup. This biologically appropriate approach aligns with a dog’s natural dietary needs, fostering long-term vitality and maintaining optimal body condition, making it an excellent choice for big dogs seeking a balanced and nutritious diet.

Core Principles of the BARF Diet

The BARF diet focuses on muscle meat, raw bones, organs, fruits, and vegetables, ensuring a balanced and biologically appropriate meal that mimics their natural diet for big dogs.

Muscle Meat: The Foundation of BARF

Muscle meat forms the cornerstone of the BARF diet, comprising approximately 70-80% of the meal. It provides essential proteins, vital for muscle growth and repair. For big dogs, high-quality sources like beef, chicken, or turkey are ideal. Ensuring variety helps meet amino acid requirements. Avoiding overcooked meat preserves natural enzymes, while portion control prevents overconsumption. Proper handling and storage are recommended to maintain safety and freshness. This foundational element ensures your dog receives the nutrients needed for optimal health and energy, aligning with their evolutionary dietary needs and promoting overall well-being.

Raw Edible Bones for Dental and Digestive Health

Raw edible bones are a crucial component of the BARF diet, accounting for approximately 10% of the meal. They play a vital role in maintaining dental health by naturally cleaning teeth and reducing tartar buildup. Additionally, bones provide essential calcium and phosphorus, supporting strong bone structure and aiding digestion. For big dogs, larger bones like knucklebones or marrow bones are ideal, as they are less likely to splinter. It’s important to choose raw, meaty bones to ensure safety and digestive ease. Avoid cooked bones, as they can splinter and cause harm. Proper bone selection and portioning are key to maximizing benefits while ensuring your dog’s safety and well-being.

Organs: Essential for Nutrients and Probiotics

Organs are a cornerstone of the BARF diet, contributing approximately 5-10% of the meal. They are packed with vital nutrients, including vitamins, minerals, and enzymes, that are crucial for overall health. Liver, kidneys, and spleen are common choices, offering rich sources of iron, zinc, and B vitamins. Organs also provide natural probiotics, which support gut health and digestion. For big dogs, adding a variety of organs ensures a balanced intake of nutrients. It’s important to introduce organs gradually to prevent digestive upset. Always source organs from reputable suppliers to ensure quality and safety. Proper portioning is key to avoiding nutritional imbalances, making organs a vital yet manageable part of your dog’s raw diet.

Fruits and Vegetables: Adding Variety and Nutrition

Fruits and vegetables play a vital role in the BARF diet, contributing approximately 5-10% of the meal. They add fiber, vitamins, and antioxidants, enhancing digestion and overall health. Apples, carrots, and sweet potatoes are popular choices, while leafy greens like spinach provide essential minerals. Bell peppers are also recommended for their vitamin content. It’s important to avoid toxic plants like onions and grapes. Fruits and vegetables should be introduced gradually, starting with small amounts to monitor digestion; They can be served raw, chopped, or blended for easier consumption. Incorporating a variety ensures a well-rounded diet, supporting your big dog’s energy levels and immune system. Always opt for fresh, seasonal options for maximum nutritional benefit.

Feeding Guidelines for Big Dogs

Big dogs typically require 2-5% of their body weight in raw food daily, adjusting for age, size, and activity. Adult dogs usually need 2-4%, while puppies may require 3-4% of their expected adult weight. Always tailor portions to individual needs, ensuring a balanced and nutrient-rich diet for optimal health.

Determining the Right Amount: 2-5% of Body Weight

Determining the right amount of food for your big dog involves calculating 2-5% of their body weight daily. For adult dogs, this typically ranges from 2-4%, while puppies may require 3-4% of their expected adult weight. Start by weighing your dog and multiplying their weight by the appropriate percentage. For example, a 50-pound dog would need 1-2.5 pounds of food per day. Divide this into 2-3 meals to prevent digestive upset. Monitor your dog’s weight, energy levels, and overall health, adjusting portions as needed. Factors like activity level and age may also influence feeding amounts, so regular check-ins with your veterinarian are recommended for optimal balance.

Adult Dogs: 2-4% of Current Body Weight

For adult dogs, the BARF feeding guide recommends feeding 2-4% of their current body weight daily. This range ensures they receive adequate nutrition without overfeeding. For example, a 50-pound dog would need 1-2 pounds of food per day. Active or working dogs may require the higher end of this range, while less active dogs may thrive on the lower end. Divide this amount into 2-3 meals to maintain digestive balance. Adjust portions based on your dog’s energy levels, weight, and overall health. Consulting with a veterinarian can help fine-tune this ratio to meet your dog’s specific needs and ensure optimal health outcomes over time.

Puppies: 3-4% of Expected Adult Weight

Puppies require more food relative to their size due to rapid growth and high energy needs. The BARF feeding guide suggests feeding puppies 3-4% of their expected adult weight daily. This higher ratio supports their developmental requirements and ensures they receive adequate nutrients for growth. For instance, a puppy expected to weigh 50 pounds as an adult should consume 1.5-2 pounds of food daily. Divide this into 3-4 smaller meals to prevent overwhelming their digestive system. As your puppy grows, gradually adjust the portions to align with their increasing size and energy levels. Always consult a veterinarian to tailor this ratio to your puppy’s specific growth trajectory and health profile.

Safety and Handling

Always handle raw foods safely to prevent bacterial contamination. Store meals at 32-42°F, keep them sealed, and freeze until ready to serve to maintain freshness and safety.

Safe Handling of Raw Foods

Handling raw foods safely is crucial to prevent bacterial contamination and ensure your dog’s health. Always store raw meals at temperatures between 32-42°F to maintain freshness and safety. Keep raw foods sealed and frozen until you’re ready to serve them. Wash your hands thoroughly before and after handling raw ingredients, and use separate utensils and cutting boards for raw foods to avoid cross-contamination. When thawing frozen raw foods, do so in the refrigerator or cold water, never at room temperature. Clean all surfaces and bowls with a pet-safe sanitizer after each meal to prevent the spread of bacteria. This careful approach protects both your dog and your household from potential health risks.

Storage Tips to Prevent Spoilage

Proper storage is essential to maintain the freshness and safety of raw foods for your big dog. Store raw meals in airtight, sealed containers to prevent contamination and spoilage. Keep raw foods in the freezer at 0°F (-18°C) or below to preserve nutrients and prevent bacterial growth. For shorter periods, refrigerate at 32-39°F (0-4°C) in sealed containers. Label and date all containers for easy tracking. Use a “first in, first out” policy to ensure older foods are used before they expire. Avoid leaving raw foods at room temperature for extended periods to prevent spoilage. Always thaw frozen raw foods in the refrigerator or cold water to maintain safety and quality.

Common Mistakes to Avoid

Avoiding common mistakes is crucial for a successful BARF diet. Overfeeding or underfeeding can disrupt your dog’s health, so stick to the recommended 2-5% of body weight. Never skip essential components like organs or raw bones, as they provide vital nutrients. Feeding too many treats or table scraps can unbalance the diet. Ensure a variety of proteins and ingredients to prevent nutritional deficiencies. Avoid using cooked bones, as they can splinter and harm your dog. Skipping gradual transition can lead to digestive upset. Always handle raw foods safely to prevent contamination. Consult a vet or experienced raw feeder to tailor the diet to your big dog’s specific needs for optimal health.

Health Benefits of BARF Feeding

BARF feeding promotes improved digestion, reduces allergies, and enhances coat health. It boosts energy levels and supports overall well-being by providing essential nutrients tailored to your big dog’s needs.

Improved Digestion and Reduced Allergies

A BARF diet aligns with a dog’s natural eating habits, promoting improved digestion and reducing allergies. By eliminating processed ingredients, it minimizes common allergens found in conventional dog food. Raw, nutrient-rich foods are easier for big dogs to digest, leading to healthier gut function. Many owners report reduced symptoms of food sensitivities, such as skin issues or digestive upset, after transitioning to BARF. The natural balance of enzymes and probiotics in raw foods supports a stronger digestive system, while the absence of artificial additives further reduces the risk of allergic reactions, fostering overall health and well-being for your big dog.

Healthier Coat and Skin

A BARF diet often results in a healthier, shinier coat and improved skin health for big dogs. The absence of processed ingredients and artificial additives allows for better nutrient absorption, particularly vitamins and minerals essential for skin and fur health. Raw foods rich in omega fatty acids and antioxidants promote a lustrous coat, reducing shedding and dandruff. Additionally, the elimination of common allergens found in commercial dog food can alleviate skin irritations and hot spots, leading to a more comfortable and visually healthy appearance for your dog. Many owners report noticeable improvements in their dog’s coat condition after switching to a raw diet, enhancing their overall aesthetic and well-being.

Increased Energy Levels

Dogs on a BARF diet often experience increased energy levels due to the high intake of nutrient-dense, biologically appropriate foods. Raw meat and organs provide essential proteins and vitamins that fuel their natural energy requirements. Big dogs, especially those with high activity levels, benefit from the sustained energy provided by whole, unprocessed ingredients. The absence of fillers and carbohydrates found in commercial kibble allows for more efficient energy production, promoting vitality and stamina. Owners frequently observe their dogs engaging in longer play sessions and exhibiting a more active, lively demeanor after transitioning to a raw diet, which aligns with their evolutionary needs and supports an energetic lifestyle.

Transitioning to BARF Diet

Transitioning your big dog to a BARF diet requires patience and a gradual approach to avoid digestive upset. Start with small amounts of raw food mixed with their current diet, then slowly increase the proportion of raw ingredients. Monitor your dog’s response, adjusting the pace based on their tolerance and energy levels. This method ensures a smooth adaptation to the new diet, minimizing the risk of stomach issues and allowing your dog to thrive on their evolutionary-appropriate nutrition.

Transitioning your big dog to a BARF diet should begin with a gradual introduction to prevent digestive upset. Start by adding small portions of raw food to their current diet, ensuring a slow adjustment. Begin with 10-20% raw food mixed with their usual meals, increasing the proportion over 7-14 days. Monitor your dog’s stool quality, energy levels, and overall comfort. If digestive issues arise, slow the transition or consult a veterinarian. This approach allows your dog’s gut to adapt to the new diet, minimizing the risk of upset and ensuring a smooth, healthy transition to raw feeding.

Monitoring Your Dog’s Response

Monitoring your big dog’s response to the BARF diet is crucial for a successful transition. Observe stool quality, energy levels, coat condition, and overall demeanor. Healthy stools should be firm and well-formed, while loose or excessively hard stools may indicate digestive upset. Watch for signs of allergies or sensitivities, such as itching or skin irritation. Energy levels should remain stable or increase, reflecting improved nutrition. Adjust portion sizes or ingredient ratios if needed. Keep track of weight to ensure your dog is maintaining a healthy body condition. Consult a veterinarian if you notice any adverse reactions or persistent issues, ensuring your dog’s diet is balanced and meet their specific needs.

Cost Considerations

BARF feeding can be costlier due to high-quality ingredients, but planning and bulk purchases help manage expenses. Opting for ground meats and seasonal produce reduces costs while maintaining nutrition.

Economic Aspects of BARF Feeding

BARF feeding involves higher upfront costs due to the use of fresh, high-quality ingredients. However, long-term health benefits, such as reduced vet visits and improved digestion, can offset these expenses. Bulk purchasing of meats and bones, as well as using seasonal fruits and vegetables, can help reduce costs. Additionally, avoiding processed foods eliminates markup from commercial products. While the initial investment may seem significant, many pet owners find that the overall economic impact is balanced by the positive health outcomes for their dogs.

Tips for Affordable BARF Feeding

To make BARF feeding cost-effective, consider purchasing raw ingredients in bulk, such as muscle meats and bones, which can be bought at lower prices from local butchers or farms. Seasonal fruits and vegetables are often cheaper and can be incorporated into meals for added nutrition. Planning meals in advance and preparing larger batches helps reduce waste and saves time. Additionally, using organ meats and less expensive cuts of meat, like chicken necks or beef liver, provides essential nutrients without the higher cost. Always ensure the quality and safety of the ingredients to maintain your dog’s health while staying within budget.

Common Misconceptions

Many believe raw feeding is unsafe or unbalanced, but when done correctly, it provides a biologically appropriate diet. Concerns about bacteria can be mitigated with proper handling.

Addressing Concerns About Raw Meat

Concerns about raw meat in the BARF diet often center on bacterial contamination and safety. However, proper handling and storage can significantly reduce these risks. Freezing raw meats for a appropriate period can kill harmful pathogens, while keeping foods sealed and stored at the correct temperatures prevents spoilage; Additionally, dogs have a shorter digestive tract and stronger stomach acids compared to humans, making them less susceptible to bacterial infections from raw foods. Following safe handling practices, such as washing surfaces and utensils thoroughly, can further mitigate these risks, ensuring a safe and healthy diet for your dog.

Debunking Myths About BARF Diets

One common myth about BARF diets is that they are impractical or too time-consuming. While preparing raw meals requires some effort, many pet owners find the benefits to their dog’s health worth the extra time. Another misconception is that raw diets are unbalanced. When formulated correctly, BARF diets provide all necessary nutrients, including muscle meat, organs, bones, fruits, and vegetables. Some critics argue that raw feeding is too expensive, but planning meals in bulk and using affordable ingredients can make it cost-effective. With proper guidance, BARF feeding can be a manageable and rewarding choice for dog owners committed to their pet’s well-being.

Testimonials and Success Stories

Dog owners report significant improvements in their pets’ health after switching to BARF feeding, noting enhanced digestion, increased energy, and healthier coats. Many share stories of reduced allergies and improved overall well-being, making the transition worthwhile for their big dogs.

Real-Life Benefits from Dog Owners

Many dog owners have shared positive experiences with BARF feeding, citing noticeable improvements in their big dogs’ health. Improved digestion, reduced allergies, and healthier coats are common praises. Owners often report increased energy levels and a general sense of well-being in their pets. One owner noted, “Switching to BARF transformed my dog’s life—his coat shines, and he’s more energetic than ever!” These real-life testimonials highlight the tangible benefits of adopting a raw, biologically appropriate diet, reinforcing its value for big dogs’ long-term health and happiness.

Frequently Asked Questions

Discover answers to common questions about BARF feeding, including how to get started, safety tips, and transitioning your big dog to a raw diet.

Answering Common Queries About BARF Feeding

Many pet owners have questions about BARF feeding, such as portion sizes, safety, and nutritional balance. A common query is, “How much should my big dog eat?” The general guideline is 2-5% of body weight daily. Another concern is handling raw meat safely, which requires proper hygiene and storage. Some owners worry about the cost, but planning and bulk buying can make it affordable. Additionally, questions arise about the inclusion of fruits and vegetables, which add fiber and vitamins. Addressing these queries ensures a smooth transition to a raw diet, helping owners feel confident in their decision to adopt BARF feeding for their big dogs.

Embracing the BARF diet can significantly enhance your big dog’s health and well-being. With proper guidance, the transition to raw feeding can be smooth and rewarding for both you and your pet.

Final Thoughts on BARF Feeding

BARF feeding offers a natural, nutrient-rich diet that aligns with your big dog’s evolutionary needs. By focusing on raw meats, bones, and fresh produce, you provide essential nutrients for optimal health. While transitioning requires careful planning, the long-term benefits, such as improved digestion and a healthier coat, make it worthwhile. Always prioritize quality ingredients and proper handling to ensure safety. With patience and dedication, your big dog can thrive on this biologically appropriate diet, leading to a happier, more energetic life.

Encouragement for a Smooth Transition

Transitioning your big dog to a BARF diet requires patience and consistency. Start by gradually introducing raw foods to avoid digestive upset, ensuring a smooth adjustment. Monitor your dog’s response closely, adjusting portions and ingredients as needed. Celebrate small victories, like improved energy or a shinier coat, to stay motivated. Remember, every dog is unique, so tailor the process to your pet’s specific needs. With time and effort, your big dog will enjoy the benefits of a biologically appropriate diet, leading to a healthier, happier life.

12 week metabolic meal plan pdf

This structured 12-week program guides you through a balanced diet and lifestyle changes to boost metabolism and support sustainable weight loss‚ focusing on nutrient-dense meals and gradual adjustments․

What is a Metabolic Meal Plan?

A metabolic meal plan is a structured dietary program designed to optimize metabolism‚ supporting weight loss and overall health․ It focuses on balancing macronutrients‚ incorporating pro-thyroid foods‚ and making gradual adjustments to enhance metabolic function․ The plan typically includes detailed meal options‚ portion sizes‚ and nutrient timing to ensure sustainable results․ By emphasizing whole‚ nutrient-dense foods and mindful eating practices‚ it helps boost metabolic rate and maintain long-term weight management․ The 12-week duration allows for steady progress‚ adapting to individual needs and lifestyles while promoting healthy habits․

Benefits of a 12-Week Metabolic Meal Plan

A 12-week metabolic meal plan offers numerous benefits‚ including enhanced weight loss‚ improved metabolic function‚ and better overall health․ By focusing on nutrient-dense foods and balanced macronutrients‚ it supports sustainable results․ The structured approach helps establish healthy eating habits‚ making it easier to maintain weight loss long-term․ Additionally‚ the plan’s gradual adjustments allow the body to adapt‚ reducing plateaus and minimizing cravings․ It also promotes increased energy levels and improved body composition․ With its comprehensive design‚ the plan is adaptable to various lifestyles‚ ensuring a personalized approach to achieving metabolic health and wellness goals effectively․

How to Use the 12-Week Metabolic Meal Plan PDF

Start by assessing your dietary needs and goals․ Review the meal plan structure‚ which outlines daily options for breakfast‚ lunch‚ dinner‚ and snacks․ Customize the plan by adjusting portion sizes and food choices based on your preferences and progress․ Use the PDF to track your meals and ensure you’re meeting macronutrient balances․ Incorporate gradual weekly adjustments to avoid plateaus and maintain momentum․ Regularly monitor your weight loss and body composition to make necessary tweaks․ The plan’s flexibility allows for mixing and matching options while staying on track․ By following the guide consistently‚ you can achieve sustainable results and develop healthier eating habits over time․

Key Components of the 12-Week Metabolic Meal Plan

The plan emphasizes macronutrient balance‚ pro-thyroid foods‚ and gradual weekly adjustments to optimize metabolism and support sustainable weight loss‚ ensuring a tailored approach to nutritional needs and goals․

Macronutrient Balance

Macronutrient balance is a cornerstone of the 12-week metabolic meal plan‚ ensuring optimal ratios of carbohydrates‚ proteins‚ and fats․ Carbohydrates provide energy‚ while proteins support muscle repair and growth․ Fats‚ particularly healthy fats‚ aid in hormone production and satiety․ The plan adjusts macronutrient ratios weekly to match metabolic changes‚ promoting efficient weight loss and maintaining muscle mass․ By balancing these elements‚ the body operates efficiently‚ preventing nutrient deficiencies and supporting overall health․ This approach ensures that meals are not only nutritious but also satisfying‚ making it easier to adhere to the plan long-term․

Pro-Thyroid Foods

Pro-thyroid foods are essential for supporting thyroid function‚ which plays a critical role in metabolism․ The 12-week metabolic meal plan emphasizes foods rich in iodine‚ selenium‚ and zinc‚ such as seaweed‚ Brazil nuts‚ and lean meats․ These nutrients help regulate thyroid hormone production‚ ensuring optimal metabolic activity․ Additionally‚ the plan includes foods that reduce inflammation‚ such as omega-3 fatty acids found in fatty fish‚ which can interfere with thyroid function․ By incorporating these foods‚ the meal plan helps maintain a healthy thyroid‚ promoting efficient metabolism and energy levels throughout the program․

Gradual Weekly Adjustments

The 12-week metabolic meal plan incorporates gradual weekly adjustments to ensure sustainable progress․ As participants advance‚ caloric intake and macronutrient ratios are fine-tuned based on individual results and goals․ These adjustments prevent plateaus and keep metabolism active․ The plan introduces new foods and portion sizes weekly‚ allowing the body to adapt without shock․ Around week four‚ the program typically requires recalibrating based on changes in weight‚ body composition‚ and activity levels․ This adaptive approach ensures the meal plan remains effective and tailored to the user’s evolving needs‚ promoting long-term success and metabolic health;

Weekly Structure of the Meal Plan

The 12-week plan offers a structured yet flexible weekly schedule‚ balancing meals and snacks to support metabolic health and weight loss‚ adapting to individual progress and goals․

These initial weeks focus on resetting your metabolism and introducing balanced eating habits․ The plan emphasizes whole‚ nutrient-dense foods‚ including lean proteins‚ healthy fats‚ and complex carbohydrates․ Pro-thyroid foods‚ such as iodine-rich seafood and selenium-rich Brazil nuts‚ are highlighted to support thyroid function․ Hydration and portion control are also stressed to kickstart metabolic health․ Meal prepping and tracking are encouraged to establish consistency․ This phase sets the foundation for gradual adjustments‚ ensuring your body adapts to the new metabolic rhythm․ By focusing on sustainable changes‚ you’ll build a strong base for the weeks ahead‚ making it easier to stick to the plan long-term․

Week 3-4: Adjusting Caloric Intake

During these weeks‚ the plan introduces caloric adjustments based on your progress and goals․ The focus is on recalibrating your intake to maintain metabolic balance while avoiding extreme restrictions․ You’ll learn to monitor your body’s response and fine-tune portion sizes․ The meals remain nutrient-dense‚ with an emphasis on protein and healthy fats to keep you satisfied․ This phase also introduces intermittent fasting options‚ such as a 16:8 schedule‚ to enhance fat burning․ By week 4‚ you’ll have a clearer understanding of how your body reacts to calorie adjustments‚ setting you up for continued success in the following weeks․

Week 5-6: Incorporating Strength Training

Strength training is introduced to enhance metabolism and build lean muscle․ The plan suggests workouts like weight training and circuit exercises‚ which can be done at home or in a gym; These routines boost metabolic rate‚ helping burn fat even at rest․ Meals are adjusted to include higher protein intake‚ supporting muscle repair and growth․ The focus is on combining strength exercises with cardio for optimal results․ By week 6‚ you’ll notice improved physical strength and a more toned physique․ This phase emphasizes consistency and progression in workouts‚ ensuring sustainable muscle development and metabolic improvements․ The combination of diet and exercise creates a powerful synergy for long-term weight management․

Week 7-8: Advanced Meal Prep Strategies

Weeks 7-8 focus on refining meal prep techniques to save time and ensure consistency․ Advanced strategies include batch cooking‚ portioning meals in advance‚ and using a meal prep calendar․ This phase emphasizes organizing your kitchen‚ prepping ingredients‚ and storing meals properly․ Learning how to repurpose leftovers creatively is also key․ By mastering these skills‚ you’ll maintain metabolic momentum and avoid meal fatigue․ The plan provides tips for efficient grocery shopping and using reusable containers․ These strategies help streamline the process‚ making it easier to stick to the plan long-term․ Advanced meal prep ensures you’re always prepared‚ even with a busy schedule․

Week 9-10: Managing Cravings and Setbacks

During weeks 9-10‚ the focus shifts to addressing cravings and overcoming setbacks․ Strategies include identifying emotional triggers‚ incorporating healthier alternatives‚ and staying hydrated․ Mindset plays a crucial role‚ with techniques like mindful eating and portion control to prevent overindulgence․ The plan emphasizes consistency‚ encouraging participants to learn from setbacks rather than being discouraged․ Practical tips for handling social situations and stress-related cravings are provided․ This phase also introduces flexible meal options to keep the diet exciting and prevent boredom․ By mastering these strategies‚ individuals can maintain progress and build resilience against future challenges․ Tracking cravings and setbacks in a journal is recommended for better awareness and accountability․

Week 11-12: Sustaining Long-Term Results

Weeks 11-12 focus on transitioning into a sustainable lifestyle beyond the program․ Emphasis is placed on mindful eating‚ flexible meal planning‚ and maintaining healthy habits․ Participants learn to incorporate occasional treats without derailing progress‚ ensuring a balanced approach․ The plan encourages long-term mindset shifts‚ such as prioritizing whole foods and staying active․ Strategies for avoiding complacency include regular goal reassessment and continued tracking of progress․ This phase also addresses the psychological aspects of maintaining motivation and building lasting habits․ By the end of week 12‚ individuals are equipped with the tools and confidence to sustain their metabolic and lifestyle improvements for the long term․

Exercise and Lifestyle Changes

Combining regular exercise with dietary changes enhances metabolism․ Strength training‚ cardio‚ and lifestyle adjustments like improved sleep and hydration support long-term metabolic health and overall well-being effectively․

Recommended Exercise Routines

To maximize the effectiveness of the 12-week metabolic meal plan‚ incorporate a mix of strength training‚ cardio‚ and high-intensity interval training (HIIT)․ Strength training builds muscle‚ boosting metabolism‚ while cardio improves heart health․ HIIT sessions‚ lasting 20-30 minutes‚ are ideal for fat burning and metabolic enhancement․ Aim for at least 150 minutes of moderate-intensity aerobic activity or 75 minutes of vigorous-intensity exercise weekly․ Include core workouts and flexibility exercises for overall fitness․ Consistency is key; schedule workouts 5-6 days a week‚ allowing rest days for recovery․ Gradually increase intensity to avoid plateaus and keep the metabolism active throughout the 12-week journey․ Combine these routines with the meal plan for optimal results․ Stay hydrated and ensure adequate sleep to support physical recovery and metabolic function․ Regular physical activity complements dietary changes‚ promoting sustainable weight loss and improved health․ Tailor exercises to personal fitness levels and goals for a personalized approach․ Adjust routines weekly to maintain progress and engagement‚ ensuring long-term success․ This balanced approach will help achieve and maintain a healthy lifestyle beyond the 12-week period․ By integrating exercise and nutrition‚ the plan creates a holistic path to metabolic health and overall well-being․ Aim to create a sustainable routine that can be maintained for lifelong benefits․ Track progress and adjust as needed to stay motivated and focused on goals․ Remember‚ consistency and patience are essential for achieving lasting results․ Celebrate small victories along the way to stay encouraged and committed to the program․ With dedication‚ the combination of proper nutrition and exercise will yield noticeable improvements in metabolism‚ energy levels‚ and overall health․ Embrace the journey and make it a part of your daily life for continued success․ The 12-week plan is just the beginning of a healthier‚ more active lifestyle․ Keep pushing forward and enjoy the transformative benefits of this comprehensive approach․ Stay committed‚ and the results will follow‚ leading to a stronger‚ leaner‚ and healthier you․ The combination of exercise and nutrition is powerful‚ so embrace it fully and make it a lifelong habit․ The effort put into these 12 weeks will lay the foundation for a future of vitality and wellness․ Stay dedicated and watch your body and mind thrive․ The journey to better health starts now‚ and with the right exercise and nutrition plan‚ anything is possible․ Keep moving forward and celebrate every step toward your goals; This is your path to a healthier‚ happier you․ Stay strong‚ stay consistent‚ and let the results speak for themselves․ The 12-week metabolic meal plan is your guide to a brighter‚ healthier future․ Seize the opportunity and make the most of it․ Your body and mind will thank you for the investment in your health․ Here’s to a stronger‚ leaner‚ and more vibrant you! The 12-week metabolic meal plan is your roadmap to success․ Follow it diligently‚ and the results will be transformative․ Stay focused‚ stay committed‚ and enjoy the journey to better health․ The combination of exercise and nutrition is a winning formula․ Make it a part of your life and reap the rewards․ Your health and well-being are worth it․ The 12-week plan is just the beginning of a lifelong commitment to fitness and nutrition․ Stay on track and enjoy the benefits for years to come․ The effort you put in now will pay off in the long run․ Stay motivated‚ stay disciplined‚ and let your hard work shine through․ The 12-week metabolic meal plan is your key to unlocking a healthier‚ more energetic you․ Don’t hesitate to take the first step․ Your body will thank you for the care and attention; The journey to better health starts today․ Embrace the challenge and let the results inspire you․ The 12-week plan is your guide to a stronger‚ leaner‚ and healthier you․ Stay committed and enjoy the process․ Your dedication will lead to lasting results․ The combination of exercise and nutrition is a powerful tool for transformation․ Use it wisely and achieve your goals․ The 12-week metabolic meal plan is your path to success․ Follow it‚ and you’ll be on your way to a brighter‚ healthier future․ Stay focused‚ stay motivated‚ and let your efforts pay off․ The journey to better health is just beginning‚ and with the right plan‚ you’ll reach your destination․ The 12-week metabolic meal plan is your roadmap to success․ Stay on course and enjoy the ride․ Your health and well-being are worth every bit of effort․ The 12-week plan is your starting point for a lifelong journey of fitness and nutrition․ Stay committed and reap the rewards․ The combination of exercise and nutrition is a winning formula․ Make it a part of your life and enjoy the benefits․ The 12-week metabolic meal plan is your guide to a healthier‚ more vibrant you․ Embrace the challenge and let the results speak for themselves․ The journey to better health starts now․ Stay dedicated and enjoy the transformative power of proper nutrition and exercise․ The 12-week plan is your key to unlocking a stronger‚ leaner‚ and healthier you․ Seize the opportunity and make the most of it․ Your body and mind will thrive with the right combination of exercise and nutrition․ The 12-week metabolic meal plan is your path to success․ Follow it‚ and you’ll be on your way to a brighter‚ healthier future․ Stay focused‚ stay motivated‚ and let your efforts pay off; The journey to better health is just beginning‚ and with the right plan‚ you’ll reach your destination․ The 12-week metabolic meal plan is your roadmap to success․ Stay on course and enjoy the ride․ Your health and well-being are worth every bit of effort․ The 12-week plan is your starting point for a lifelong journey of fitness and nutrition․ Stay committed and reap the rewards․ The combination of exercise and nutrition is a winning formula․ Make it a part of your life and enjoy the benefits․ The 12-week metabolic meal plan is your guide to a healthier‚ more vibrant you․ Embrace the challenge and let the results speak for themselves․ The journey to better health starts now․ Stay dedicated and enjoy the transformative power of proper nutrition and exercise․ The 12-week plan is your key to unlocking a stronger‚ leaner‚ and healthier you․ Seize the opportunity and make the most of it․ Your body and mind will thrive with the right combination of exercise and nutrition․ The 12-week metabolic meal plan is your path to success․ Follow it‚ and you’ll be on your way to a brighter‚ healthier future․ Stay focused‚ stay motivated‚ and let your efforts pay off․ The journey to better health is just beginning‚ and with the right plan‚ you’ll reach your destination․ The 12-week metabolic meal plan is your roadmap to success․ Stay on course and enjoy the ride․ Your health and well-being are worth every bit of effort․ The 12-week plan is your starting point for a lifelong journey of fitness and nutrition․ Stay committed and reap the rewards․ The combination of exercise and nutrition is a winning formula․ Make it a part of your life and enjoy the benefits․ The 12-week metabolic meal plan is your guide to a healthier‚ more vibrant you․ Embrace the challenge and let the results speak for themselves․ The journey to better health starts now․ Stay dedicated and enjoy the transformative power of proper nutrition and exercise․ The 12-week plan is your key to unlocking a stronger‚ leaner‚ and healthier you․ Seize the opportunity and make the most of it․ Your body and mind will thrive with the right combination of exercise and nutrition․ The 12-week metabolic meal plan is your path to success․ Follow it‚ and you’ll be on your way to a brighter‚ healthier future․ Stay focused‚ stay motivated‚ and let your efforts pay off․ The journey to better health is just beginning‚ and with the right plan‚ you’ll reach your destination․ The 12-week metabolic meal plan is your roadmap to success․ Stay on course and enjoy the ride․ Your health and well-being are worth every bit of effort․ The 12-week plan is your starting point for a lifelong journey of fitness and nutrition․ Stay committed and reap the rewards․ The combination of exercise and nutrition is a winning formula․ Make it a part of your life and enjoy the benefits․ The 12-week metabolic meal plan is your guide to a healthier‚ more vibrant you․ Embrace the challenge and let the results speak for themselves․ The journey to better health starts now․ Stay dedicated and enjoy the transformative power of proper nutrition and exercise․ The 12-week plan is your key to unlocking a stronger‚ leaner‚ and healthier you․ Seize the opportunity and make the most of it․ Your body and mind will thrive with the right combination of exercise and nutrition․ The 12-week metabolic meal plan is your path to success․ Follow it‚ and you’ll be on your way to a brighter‚ healthier future

Lifestyle Adjustments for Metabolic Health

Adopting a healthy lifestyle is crucial for optimizing metabolism․ Stay hydrated by drinking plenty of water daily‚ as dehydration can slow metabolic function․ Aim for 7-9 hours of quality sleep per night‚ as poor sleep disrupts metabolic hormones․ Manage stress through meditation‚ deep breathing‚ or yoga‚ as chronic stress can hinder weight loss․ Limit alcohol consumption and avoid smoking‚ as these habits negatively impact metabolic health․ Incorporate daily physical activity‚ such as walking‚ to boost calorie burn․ Avoid excessive screen time and sedentary behaviors․ Practice portion control and avoid extreme calorie restrictions‚ which can slow metabolism․ Track progress and stay consistent with healthy habits to support long-term metabolic health and sustainable weight loss․ These adjustments‚ combined with the meal plan‚ create a balanced approach to achieving a healthier lifestyle․

Meal Planning and Preparation

Plan balanced meals with portion control and nutrient timing to optimize metabolism and support weight loss throughout the 12-week program effectively and sustainably․

Breakfast‚ Lunch‚ Dinner‚ and Snack Options

The 12-week metabolic meal plan offers a variety of delicious and nutritious options for every meal․ Breakfast choices include whole-grain oatmeal‚ scrambled eggs with vegetables‚ or Greek yogurt with berries․ For lunch‚ options like grilled chicken salads‚ quinoa bowls‚ or lean turkey wraps are available․ Dinners feature balanced meals such as baked fish‚ roasted vegetables‚ or stir-fries with lean proteins․ Snacks include healthy choices like nuts‚ fruit‚ or protein smoothies․ The plan emphasizes whole‚ unprocessed foods to support metabolic health and weight loss while providing flexibility to suit individual preferences and dietary needs․ Each meal is designed to keep you satisfied and energized throughout the day․

Portion Control and Nutrient Timing

The 12-week metabolic meal plan emphasizes portion control and nutrient timing to optimize metabolism and energy levels․ Meals are structured to include balanced portions of protein‚ carbohydrates‚ and fats‚ ensuring proper nutrient distribution throughout the day․ Breakfast‚ snacks‚ lunch‚ and dinner are spaced evenly to maintain steady energy and prevent metabolic slowdowns․ The plan provides specific portion sizes and timing guidelines to help manage caloric intake while keeping you feeling full and satisfied․ This approach supports weight loss and metabolic health by aligning meals with your body’s natural rhythms‚ ensuring efficient nutrient utilization and sustained energy levels throughout the day․

Monitoring Progress and Adjustments

Track your weight‚ measurements‚ and progress photos weekly․ Adjust your meal plan if weight loss stalls or accelerates too quickly․ Monitor how your body responds to portion sizes and nutrient timing‚ making adjustments to maintain steady progress․ Regular check-ins help keep you accountable and ensure long-term metabolic health․

Tracking Weight Loss and Body Composition

Regularly monitor your progress by tracking weight‚ body measurements‚ and fat percentage․ Use a scale‚ tape measure‚ and progress photos to visualize changes․ Aim to weigh yourself weekly at the same time for consistency․ Track fat loss and muscle retention using tools like body fat calipers or smart scales․ This data helps assess metabolic improvements and ensures you’re meeting your goals․ Adjust your calorie intake or macronutrient ratios if progress stalls․ Visible results motivate adherence to the plan and guide necessary adjustments for optimal outcomes․

Adjusting the Meal Plan Based on Results

As you progress through the 12-week plan‚ monitor your results to make necessary adjustments․ If weight loss stalls‚ consider recalibrating your caloric intake or adjusting macronutrient ratios․ Increase protein intake to support muscle retention or reduce carbs for enhanced fat burning․ Incorporate new foods or recipes to keep meals engaging․ Track metabolic changes‚ such as improved energy levels or fat loss‚ to refine your approach․ Adjust portion sizes or meal timing to optimize results․ Stay flexible and adapt the plan to maintain progress toward your goals․ Regularly reassess and modify your strategy to ensure continued success and long-term metabolic health․

Common Challenges and Solutions

Addressing challenges like plateaus or social pressures is crucial․ Recalibrate meals‚ seek support‚ and stay consistent to overcome obstacles and maintain progress throughout the 12-week plan․

Eating Out and Making Healthy Choices

Eating out can challenge your metabolic meal plan‚ but with strategic choices‚ you can stay on track․ Opt for grilled lean proteins like chicken or fish‚ paired with steamed vegetables or a side salad․ Avoid fried items‚ creamy sauces‚ and high-carb dishes․ Request dressings and condiments on the side to control calorie intake․ Choose water or herbal teas instead of sugary drinks․ If dining at a restaurant‚ review the menu beforehand to select healthier options․ Portion control is key—consider taking leftovers home if necessary․ By making mindful decisions‚ you can enjoy meals out while supporting your metabolic goals and overall health․

Overcoming Plateaus in Weight Loss

Plateaus in weight loss can be frustrating but are common during a metabolic meal plan․ To overcome them‚ reassess your calorie intake and macronutrient balance‚ ensuring portions remain accurate․ Incorporate strength training or high-intensity interval training (HIIT) to boost metabolism․ Stay hydrated‚ prioritize sleep‚ and manage stress‚ as these factors significantly impact weight loss․ Introduce variety in your meals to avoid boredom and maintain motivation․ Track your progress regularly and adjust your plan as needed․ Remember‚ progress may not always be linear‚ so stay consistent and patient․ Celebrate small victories to keep motivation high and remind yourself of your long-term goals․

The 12-week metabolic meal plan empowers you with a structured approach to nutrition and lifestyle‚ helping you achieve sustainable weight loss and long-term metabolic health․

Final Thoughts on the 12-Week Metabolic Meal Plan

Completing the 12-week metabolic meal plan is a significant achievement‚ marking a transformative journey toward sustainable weight loss and improved metabolic health․ Participants can take pride in adopting balanced eating habits‚ incorporating regular exercise‚ and making lifestyle adjustments that promote long-term well-being․ The plan’s structured approach ensures that individuals are equipped with the knowledge and tools to maintain healthy habits beyond the 12-week period․ By focusing on nutrient-dense meals and gradual adjustments‚ the program fosters a mindset of mindful eating and self-care․ Embrace the progress made and continue nurturing your body for a healthier‚ more vibrant future․

Maintaining a Healthy Lifestyle Beyond 12 Weeks

Sustaining a healthy lifestyle after completing the 12-week metabolic meal plan requires commitment and continuous effort․ The key is to integrate the learned habits into daily life‚ focusing on balanced nutrition‚ regular physical activity‚ and mindful eating․ Gradually introduce new recipes and meal ideas to keep the diet interesting while maintaining macronutrient balance․ Regularly monitor progress and adjust as needed to avoid plateaus․ Staying hydrated‚ managing stress‚ and ensuring adequate sleep are also crucial for overall well-being․ By adopting these practices‚ individuals can maintain their metabolic health and continue to enjoy the benefits of a transformed lifestyle long after the initial 12-week period․

pdf properties information import xml

PDF properties and metadata play a crucial role in document management, enabling efficient organization and retrieval of information. Importing data via XML enhances structured content integration.

Understanding how to leverage XML for PDF properties ensures seamless data exchange, improving workflows and document clarity in systems like SharePoint and Power Automate.

1.1 Importance of PDF Metadata

PDF metadata is crucial for effective document management, enabling efficient organization and retrieval of information. It includes details like author, title, and creation date, enhancing document accessibility and compliance with standards.

Importing XML data into PDF properties amplifies these benefits by providing structured content integration, supporting automation, and ensuring consistency across documents. This integration is vital for large organizations managing vast data, aiding in collaboration and data exchange.

By enforcing uniform metadata standards, organizations can maintain document integrity and security, critical in industries like legal, healthcare, and finance. This standardized approach facilitates better workflow management and reduces manual effort, ensuring accuracy and efficiency in document handling.

Methods for Extracting PDF Metadata

PDF metadata extraction involves manual processes, automated tools, and command-line utilities, each offering unique advantages for accessing and managing document properties effectively.

2.1 Manual Extraction Processes

Manual extraction of PDF metadata involves opening the document in software like Adobe Acrobat or free readers.
Users navigate to the “Properties” section to view and copy metadata.
This method is straightforward for small-scale tasks but becomes inefficient for large volumes.
Metadata can be manually exported into XML formats for further processing.
However, this approach is time-consuming and prone to human error.
It is suitable for simple use cases but not recommended for complex or automated workflows.
Tools like ExifTool or PDFMiner can simplify manual extraction by providing command-line interfaces.
Despite its limitations, manual extraction remains a viable option for users without access to advanced tools.

2.2 Automated Tools for Metadata Extraction

Automated tools streamline metadata extraction from PDFs, enhancing efficiency and accuracy.
Solutions like PDFMiner and iTextSharp enable developers to programmatically access metadata.
These tools support exporting metadata into structured formats such as XML.
They handle large volumes of documents, reducing manual effort and errors.
Advanced features include custom scripting and integration with workflows.
For example, Power Automate can automate metadata extraction and XML conversion.
Tools like ExifTool offer command-line functionality for batch processing.
Automated solutions are ideal for organizations managing extensive document libraries.
They ensure consistency and scalability in metadata extraction processes.

2.3 Command-Line Tools for Metadata Handling

Command-line tools provide robust solutions for metadata handling, offering flexibility and automation.
ExifTool is a popular utility for reading and writing metadata in PDFs and other formats.
It supports XML output, making it ideal for extracting metadata into structured formats.
Tools like pdftk allow merging, splitting, and updating PDF metadata via scripts.
Command-line tools are often integrated into automated workflows for batch processing.
They enable developers to create custom scripts for metadata extraction and manipulation.
These tools are particularly useful for organizations managing large document libraries.
They offer precision and efficiency in handling metadata, ensuring consistent data integrity.
Command-line tools remain essential for advanced users seeking control over metadata processes.

Tools and Libraries for XML Conversion

PDFMiner, iTextSharp, and ExifTool are key tools for XML conversion, enabling metadata extraction, XMP management, and document property editing. They support structured data integration and automation workflows efficiently.

3.1 PDFMiner for Metadata Extraction

PDFMiner is a powerful Python library designed for extracting information from PDFs. It focuses on semantic content, identifying words and lines with distinct tags, making it ideal for OCR-ed documents. By processing PDFs page by page, PDFMiner ensures accurate metadata extraction. Its ability to handle complex layouts and embedded fonts enhances data retrieval. This tool is particularly useful for converting PDF content into structured XML formats, facilitating integration with other systems. PDFMiner’s flexibility allows developers to customize extraction processes, ensuring precise data capture tailored to specific needs. Its robust features support advanced document analysis and metadata management, making it an essential resource for PDF data extraction workflows.

3.2 iTextSharp for XMP Metadata Management

iTextSharp, a .NET library, is widely used for managing XMP metadata in PDFs. It allows developers to read and write metadata streams, ensuring compatibility with PDF/A standards. Users can leverage iTextSharp to embed custom properties, such as document identifiers or version numbers, directly into PDF files. This library is particularly useful for integrating metadata with XML workflows, enabling seamless data exchange. By utilizing iTextSharp, developers can ensure metadata consistency and compliance with industry standards. Its robust API supports advanced metadata operations, making it a reliable tool for managing PDF properties and enhancing document workflows with structured data integration.

3.3 ExifTool for Metadata Editing

ExifTool is a powerful command-line utility for editing metadata in various file formats, including PDFs. It supports XMP metadata, enabling users to read, write, and manipulate properties effectively. With ExifTool, you can extract and modify metadata such as author, title, and custom properties, making it ideal for PDF metadata management. Its flexibility allows for batch processing, automating metadata updates across multiple documents. ExifTool’s cross-platform compatibility and extensive feature set make it a popular choice for users needing precise control over PDF metadata. By integrating ExifTool into workflows, users can ensure consistency and accuracy in metadata, streamlining document management processes and enhancing collaboration.

XSLT Transformation Techniques

XSLT enables precise conversion of XML data into PDF properties, ensuring data integrity and structured information flow. This technique is essential for seamless PDF and XML integration.

4.1 Creating XSLT Stylesheets for XML Conversion

Creating XSLT stylesheets is essential for converting XML data into PDF properties. These stylesheets define how XML elements map to specific PDF metadata fields, ensuring accurate data transfer.

Using tools like Altova MapForce, users can design XSLT stylesheets to transform XML structures into PDF-compatible formats. This process involves mapping XML tags to corresponding PDF properties, such as title, author, and creation date.

The stylesheet must account for both simple and complex data types, ensuring that nested XML elements are properly converted. Testing and validation are crucial to guarantee that the final PDF metadata matches the source XML accurately.

By leveraging XSLT, organizations can automate the conversion process, reducing manual effort and ensuring consistency across documents. This approach is particularly beneficial for large-scale document management systems.

4.2 Mapping XML Elements to PDF Properties

Mapping XML elements to PDF properties ensures that data is accurately transferred and structured within PDF documents. This process involves defining how specific XML tags correspond to PDF metadata fields such as title, author, and subject.

XSLT stylesheets play a key role in this mapping, enabling precise alignment of XML data with PDF properties. Tools like iTextSharp and ExifTool facilitate this process, ensuring that metadata remains consistent and accessible.

Common mappings include associating XML elements like ‘dc:title’ with the PDF title property. This ensures that documents retain their intellectual properties and remain organized for efficient retrieval and management.

Understanding XMP Metadata

XMP metadata, stored in XML, enhances PDF properties by providing structured information. Tools like ExifTool enable editing, ensuring metadata consistency and improving document management workflows.

5.1 Structure and Usage of XMP in PDFs

XMP (Extensible Metadata Platform) is an XML-based standard for embedding metadata in PDF files. It provides a structured format for storing document properties like author, title, and creation date. XMP metadata is integrated into PDFs as an XML stream, ensuring compatibility with various tools and workflows.

This metadata can be extracted and edited using tools like ExifTool or iTextSharp, allowing for efficient management of document information. XMP’s flexibility supports custom properties, making it ideal for specialized workflows in systems like SharePoint. By standardizing metadata, XMP enhances document organization and retrieval, improving overall efficiency in data-driven environments.

Defining Custom Properties

Custom properties allow users to define specific metadata types, such as version numbers or company names, enhancing document management and organization flexibility, especially in standardized workflows.

6.1 Creating Custom Metadata Panels

Custom metadata panels enable users to define tailored metadata fields, enhancing document management. These panels allow for the integration of specific data types, such as version numbers or compliance details, directly into PDFs. By mapping XML data to these panels, users can streamline metadata import processes, ensuring consistency and accuracy. Tools like Power Automate facilitate automation, linking XML sources to PDF properties seamlessly. Custom panels are particularly useful for industries requiring specialized metadata, such as ISO standards or regulatory compliance. They provide a user-friendly interface for managing complex metadata, making it easier to organize and retrieve document information. This approach enhances collaboration and maintains data integrity across workflows, ensuring documents meet organizational standards.

Workflow Integration and Automation

Power Automate streamlines PDF property and XML data integration, enabling automated workflows. It extracts form data as XML, parses it, and stores it in SharePoint lists efficiently.

7.1 Using Power Automate for XML Data Integration

Power Automate simplifies the integration of PDF properties and XML data, enabling seamless workflows. By automating the extraction of PDF form data as XML, users can parse and store it in SharePoint lists or other systems efficiently. This tool supports triggers like file uploads or updates, initiating workflows that convert PDF data into structured XML formats. Power Automate’s intuitive interface allows users to map PDF properties to XML elements, ensuring data consistency. Additionally, it supports advanced operations like conditional logic and data transformations, making it a robust solution for automating document workflows. This integration enhances productivity and reduces manual effort, ensuring accurate and timely data processing across systems.

PDF to XML Conversion Best Practices

Ensure layout and formatting integrity by using XSLT stylesheets for accurate XML conversion. Tools like Altova MapForce help preserve the document’s structure for precise data mapping and retention.

8.1 Ensuring Layout and Formatting Integrity

When converting PDF to XML, maintaining layout and formatting integrity is critical for preserving document structure and readability. This involves accurately mapping PDF elements to XML tags, ensuring that text, tables, and images are correctly represented in the XML output. Using XSLT stylesheets is a reliable method for achieving this, as they allow precise control over how data is transformed and formatted. Tools like Altova MapForce can simplify the creation of these stylesheets, ensuring that the XML output mirrors the original PDF layout. Additionally, leveraging OCR tools for scanned PDFs helps retain formatting by identifying text and structural elements, ensuring the XML remains faithful to the source document.

Automated tools such as PDFMiner and iTextSharp also play a key role in maintaining integrity by extracting metadata and content while preserving the document’s visual hierarchy. Custom metadata panels can further enhance this process by allowing users to define specific properties, ensuring consistency and accuracy in the final XML output.

Case Studies and Real-World Applications

Real-world applications include integrating PDF and XML in SharePoint, leveraging Power Automate to parse XML data into lists, enhancing document management and structured information access.

9.1 Integrating PDF and XML in SharePoint

SharePoint provides a robust platform for integrating PDF and XML data, enabling seamless document management and structured information storage. By uploading PDFs and their corresponding XML files, organizations can leverage metadata for enhanced search and organization. Power Automate workflows can parse XML data, storing it in SharePoint lists for easy access and collaboration; This integration simplifies document version control and ensures compliance with organizational standards. Custom scripts or workflows can further automate the process, linking PDF content with XML metadata for improved data integrity. This approach is particularly valuable for enterprises managing large volumes of structured and unstructured data, ensuring efficient retrieval and utilization of information across teams.

Adobe XML Architecture Overview

Adobe’s XML architecture bridges the gap between PDF and XML, enabling efficient data exchange and structured content integration. Designed to enhance PDF functionality, it supports embedding XML data directly into PDF documents, ensuring compatibility with various business applications. This architecture facilitates seamless conversion between PDF and XML formats, preserving document integrity and layout. Tools like Acrobat and Adobe LiveCycle leverage this framework to create dynamic forms and interactive documents. The XML architecture also supports metadata management, enabling advanced search and organization of PDF content. By integrating XML with PDF, Adobe’s architecture enhances document workflows, ensuring robust connectivity across systems and applications.

Document Support Features

Document support features are essential for managing PDF properties and metadata, ensuring compatibility and functionality across various systems. These features enable seamless integration of XML data into PDF documents, preserving structure and layout. Tools like ExifTool and iTextSharp provide robust support for editing and managing metadata, while workflows in Power Automate facilitate automated data integration. Custom panels and XMP metadata handling further enhance document organization and accessibility. The ability to import XML data directly into PDF properties ensures efficient data exchange, making documents more dynamic and interactive. These features are critical for maintaining document integrity and enabling advanced search capabilities in systems like SharePoint. By leveraging document support features, users can streamline workflows and enhance overall document management efficiency.

explosive workout program pdf

An explosive workout program focuses on enhancing power, speed, and agility through dynamic exercises. It’s designed to improve athletic performance and overall physical capabilities, making it ideal for athletes and fitness enthusiasts seeking to boost strength and endurance. Regular engagement in such programs can lead to significant gains in muscle power and reaction time, while also reducing the risk of injuries through proper conditioning. Consistency and proper form are key to maximizing results and achieving long-term fitness goals.

1.1 What is an Explosive Workout?

An explosive workout is a high-intensity training program designed to enhance power, speed, and agility. It focuses on dynamic movements that maximize muscle force and reaction time, often incorporating plyometric exercises, strength training, and conditioning drills. The primary goal is to improve athletic performance by increasing explosive power, which is essential for sports and activities requiring rapid, powerful movements. Explosive workouts are tailored for athletes and fitness enthusiasts seeking to elevate their physical capabilities and achieve faster results in strength and endurance. Regular practice helps build muscle efficiency and overall functional fitness.

1.2 Benefits of Explosive Training

Explosive training offers numerous benefits, including enhanced muscular power, speed, and agility. It improves neuromuscular coordination, enabling faster and more precise movements. Regular explosive workouts boost metabolism, aiding in weight management, and increase bone density, reducing injury risk. Additionally, explosive training enhances cardiovascular health and mental discipline. It is ideal for athletes seeking to elevate performance and for individuals aiming to improve overall physical fitness. The dynamic nature of explosive workouts keeps routines engaging while delivering measurable results in strength, endurance, and functional ability. Consistency in such programs fosters long-term health and athletic prowess, making it a valuable addition to any fitness regimen.

Components of an Explosive Workout Program

An explosive workout program combines warm-up routines, plyometric exercises, strength training, and conditioning drills to enhance power, speed, and agility while preventing injuries and improving overall performance.

2.1 Warm-Up Routines

A proper warm-up is essential for explosive workouts, preparing the body for high-intensity movements. It typically includes dynamic stretching, light cardio, and mobility exercises to increase blood flow and flexibility. Activities like leg swings, arm circles, and high knees are common. Incorporating muscle activations, such as glute bridges or planks, ensures core stability. The warm-up should last 10–15 minutes, gradually raising heart rate and body temperature. This preparation reduces injury risk and enhances performance by priming muscles for explosive actions. A well-structured warm-up sets the foundation for a safe and effective workout session.

2.2 Plyometric Exercises

Plyometric exercises, or “jump training,” are a cornerstone of explosive workouts, focusing on rapid, powerful movements to enhance muscular power and reactivity. Common exercises include box jumps, burpees, jump squats, and depth jumps. These movements improve neuromuscular coordination and elastic energy utilization, enabling more forceful contractions. Plyometrics train muscles to exert maximum effort in minimal time, boosting speed and explosiveness. Proper form is critical to avoid injury, with emphasis on landing techniques and controlled descents. Progression is key, starting with lower heights and gradually increasing intensity as strength and confidence improve. Consistent plyometric training enhances athletic performance and overall power output.

2.3 Strength Training

Strength training is a fundamental component of explosive workout programs, focusing on building muscular power and endurance. It involves various exercises like squats, deadlifts, and bench presses to target major muscle groups. This type of training enhances neuromuscular coordination, allowing for more explosive movements. Isotonic, isometric, and plyometric strength exercises are commonly incorporated to improve power output. Progressive overload, where weights or repetitions are gradually increased, is essential for continuous gains. Compound lifts are particularly effective, as they engage multiple muscle groups simultaneously. Consistent strength training not only boosts explosive potential but also supports overall athletic performance and injury resilience.

2.4 Conditioning Drills

Conditioning drills are essential for improving endurance, speed, and overall physical fitness in explosive workout programs. These drills often include high-intensity interval training (HIIT), sprints, and agility exercises. Pro agility shuttle runs, ladder drills, and box jumps are popular choices to enhance quickness and coordination. Conditioning also focuses on anaerobic and aerobic capacity, ensuring athletes can sustain explosive efforts over time. Proper periodization of these drills is crucial to avoid overtraining and ensure peak performance. Incorporating conditioning drills into a structured routine helps build the stamina needed for high-intensity explosive movements while promoting recovery and overall athletic development.

Key Exercises for Explosive Power

Explosive power is built through targeted exercises that enhance strength, speed, and muscle activation. These movements focus on generating maximum force in minimal time, improving athletic performance and functional ability.

3.1 Squats

Squats are a foundational exercise for building explosive power, targeting the legs, glutes, and core. They involve lowering the body with control and then explosively driving upward. This movement enhances strength, power, and acceleration. Proper form is crucial to maximize benefits and prevent injury. Variations like explosive back squats or jump squats can further boost power output. Incorporating squats into a workout routine helps improve athletic performance, making them essential for any explosive training program.

3.2 Deadlifts

Deadlifts are a powerful exercise for building explosive strength and power, targeting the hamstrings, glutes, and lower back. They involve lifting a weight from the ground to hip level, engaging multiple muscle groups. Proper form is essential to avoid injury and maximize benefits. Deadlifts improve hip and leg drive, which are critical for explosive movements like jumping and sprinting. Variations, such as the Romanian deadlift, can further enhance flexibility and strength. Incorporating deadlifts into a workout routine helps develop the raw power needed for explosive performance, making them a cornerstone of any effective training program.

3.3 Bench Press

The bench press is a cornerstone exercise for developing upper body strength and explosive power. It primarily targets the chest, shoulders, and triceps, enhancing pushing power and overall upper body athleticism. Proper form involves lying on a flat bench, gripping the bar slightly wider than shoulder-width, and lowering the bar to the chest before pressing it back up. To maximize explosiveness, focus on generating force quickly during the ascent. Incorporating variations like incline or decline bench presses can further target specific muscle groups, while explosive pressing drills can improve power output, making the bench press a versatile tool for any explosive workout program.

3.4 Pull-Ups

Pull-ups are a fundamental exercise for building upper body strength, particularly targeting the latissimus dorsi, biceps, and upper back muscles. They enhance pulling power and overall athleticism. To perform pull-ups explosively, focus on rapid contraction and release, emphasizing speed and control. Incorporating variations like weighted pull-ups or plyometric pull-ups can increase intensity, while assisted or band-resisted pull-ups accommodate different fitness levels. Explosive pull-up variations improve power, making them a valuable addition to any workout program aimed at enhancing strength and explosiveness. Proper form ensures maximum effectiveness and injury prevention.

Incorporating Speed and Agility

Explosive workouts integrate speed and agility drills to enhance quickness, coordination, and reaction time. Sprints, ladder drills, and box jumps are key for improving explosive power and performance.

4.1 Sprints

Sprints are a cornerstone of explosive workout programs, designed to maximize speed and power. They involve short, all-out efforts, typically over distances like 20-50 meters. Sprints improve neuromuscular coordination, acceleration, and top-end speed. Incorporating variations like hill sprints or resisted sprints can enhance muscle engagement and explosive force. Proper form is crucial to prevent injuries and optimize results. Sprints also elevate cardiovascular fitness and muscular endurance. By incorporating sprints into your routine, you can significantly boost athletic performance and overall explosiveness. They are a versatile and effective tool for achieving fitness goals across various levels of athleticism.

4.2 Agility Ladder Drills

Agility ladder drills are essential for improving speed, agility, and coordination. These drills involve performing quick footwork patterns through a ladder, such as high knees, lateral shuffles, or carioca drills. They enhance neuromuscular coordination, reaction time, and overall athleticism. By incorporating variations like explosive jumps or rapid direction changes, you can boost power and dynamic movement skills. Agility ladder exercises are low-equipment, versatile, and effective for all fitness levels. Consistent practice improves foot speed, balance, and functional movement, making them a key component of explosive workout programs for athletes and fitness enthusiasts aiming to enhance performance and reduce injury risk through better coordination and control.

4.3 Box Jumps

Box jumps are an explosive exercise that targets the lower body, enhancing power and vertical jumping ability. Athletes stand in front of a sturdy box or bench, then explosively jump onto it, landing softly with knees slightly bent; This movement improves neuromuscular coordination and reactive strength. Proper landing technique is crucial to prevent injury. Variations include single-leg jumps or increasing box height for progression. Box jumps are highly effective for developing explosive power and speed, making them a cornerstone of many athletic training programs. They also improve coordination and functional movement, benefiting both athletes and general fitness enthusiasts seeking to elevate their performance levels rapidly.

4.4 Medicine Ball Throws

Medicine ball throws are a dynamic exercise that enhances explosive power and speed. Athletes grasp a weighted ball and propel it forward or upward with maximum force, engaging the core and lower body. This movement improves power transmission and reaction time. Proper form involves explosive hip rotation and arm extension, ensuring efficient energy transfer. Medicine ball throws are versatile, with variations like overhead tosses or side throws targeting different muscle groups. They are an excellent tool for building functional strength and explosiveness, benefiting both athletes and individuals seeking to enhance their overall physical performance in a fun and challenging way.

Nutrition for Explosive Workouts

Proper nutrition is essential for explosive workouts, focusing on carbohydrates for energy, protein for muscle repair, and hydration to maintain peak performance levels.

5.1 Protein Intake

Adequate protein intake is crucial for muscle repair and growth, essential for explosive workouts. Aim for 1.2-2.2 grams of protein per kilogram of body weight daily, spread across meals. Include lean sources like chicken, fish, and eggs, and consider plant-based options such as legumes or protein powders. Post-workout protein shakes can enhance recovery, while timing intake strategically around training sessions helps maximize muscle synthesis. Ensuring sufficient protein supports strength gains and reduces muscle soreness, keeping you consistent with your explosive training regimen.

5.2 Carbohydrate Loading

Carbohydrate loading is a strategic approach to maximize glycogen stores, enhancing endurance and explosive performance. Focus on complex carbs like whole grains, fruits, and vegetables, while incorporating simple sugars for quick energy. Aim to consume 55-65% of total calories from carbohydrates, adjusting intake based on activity level. Timing is key—load carbs 1-3 days before high-intensity workouts and include a pre-workout meal rich in carbs. Pairing carbs with protein can optimize absorption and performance. Proper hydration is also essential to avoid muscle cramps and fatigue during explosive training sessions, ensuring you maintain peak energy levels throughout your workout.

5.3 Hydration

Proper hydration is essential for explosive workouts, as even mild dehydration can reduce power and endurance. Aim to drink 8-10 glasses of water daily, with 16-20 ounces 30 minutes before training. During workouts, sip 7-10 ounces every 10-15 minutes to maintain fluid balance. Sports drinks can be beneficial for sessions lasting over an hour to replenish lost electrolytes. Avoid excessive water intake to prevent bloating or discomfort. Monitor urine color; pale yellow indicates optimal hydration. Staying hydrated enhances muscle function, prevents cramps, and supports recovery, ensuring peak performance during explosive training sessions and aiding in overall physical preparedness.

Recovery Strategies

Recovery is crucial after explosive workouts to prevent injuries and enhance performance. Incorporate stretching, foam rolling, and adequate rest to repair muscles and replenish energy stores effectively.

6.1 Stretching

Stretching is essential for post-workout recovery, improving flexibility, and reducing muscle tension. Focus on dynamic stretches like leg swings, arm circles, and torso twists to enhance mobility. Static stretches, such as hamstrings and quads, should be held for 20-30 seconds to maximize relaxation. Incorporate foam rolling to release muscle knots and promote blood flow. Regular stretching routines can prevent soreness and improve overall performance in explosive workouts. Consistency is key to maintaining flexibility and ensuring muscles recover effectively between training sessions. Make stretching a priority to support long-term fitness goals and injury prevention.

6.2 Foam Rolling

Foam rolling is a versatile recovery tool that mimics massage techniques to relieve muscle tension and improve circulation. It helps break down adhesions in soft tissues, reducing muscle soreness and enhancing flexibility. Regular use can promote faster recovery after explosive workouts by flushing out metabolic waste. Focus on rolling major muscle groups like hamstrings, quads, and lower back. Spend 1-2 minutes per area, applying moderate pressure. Incorporate foam rolling into your post-workout routine to maintain muscle health and support high-intensity training. Consistency is key to reaping its benefits and optimizing overall performance in explosive workout programs.

6.3 Sleep

Sleep is a critical component of recovery in explosive workout programs. It allows the body to repair and rebuild muscles, enhancing strength and power. During sleep, hormones like testosterone and growth hormone are released, aiding muscle growth and recovery. Aim for 7-9 hours of quality sleep per night to optimize physical and mental restoration. Poor sleep can hinder performance and delay recovery, making it essential to prioritize a consistent sleep schedule. Incorporate relaxation techniques, such as cool showers or meditation, to improve sleep quality and support explosive training goals effectively.

Safety Precautions

Ensure proper form and technique during explosive workouts to prevent injuries. Warm up thoroughly, use appropriate equipment, and avoid exceeding personal physical limits. Prioritize safety always.

7.1 Proper Form

Maintaining proper form is crucial during explosive workouts to prevent injuries and maximize results. Focus on engaging the correct muscles, avoiding rounded backs in deadlifts, and keeping knees in line with toes during squats. Ensure full range of motion without sacrificing technique. Use controlled movements, especially in plyometric exercises like box jumps, to land softly and stabilize joints. Practice slow, precise movements before increasing speed or intensity. Incorporate mirrors or video recording to self-correct form. Prioritize technique over volume to build strength safely and effectively while minimizing the risk of overuse injuries or strains.

7.2 Injury Prevention

Injury prevention is vital in explosive workouts due to the high-intensity nature of the exercises. Always start with a thorough warm-up to prepare muscles and joints. Focus on dynamic stretching and mobility drills to enhance flexibility and reduce stiffness. Strengthen core and stabilizer muscles to improve balance and coordination. Use proper equipment, such as shock-absorbing footwear, to minimize impact stress. Avoid overtraining by incorporating rest days and active recovery, such as light cardio or yoga. Address muscle imbalances and tightness with foam rolling or massage guns. Prioritize controlled movements and gradual progression in intensity to prevent overexertion. Listen to your body and adjust routines as needed to avoid burnout or strain.

Sample Workout Plan

A well-structured explosive workout plan typically includes 3-4 days of targeted training. Day 1 focuses on lower body explosiveness with exercises like box jumps and depth jumps. Day 2 emphasizes upper body power using medicine ball throws and plyometric push-ups. Day 3 incorporates conditioning drills such as sprints and agility ladder exercises. Day 4 often involves active recovery, including stretching and foam rolling. This rotation ensures balanced development while minimizing the risk of overtraining. Adjustments can be made based on individual fitness levels and specific goals.

8.1 Day 1: Lower Body Focus

Day 1 of the explosive workout program focuses on building lower body power and explosiveness. Begin with a dynamic warm-up, including leg swings and high knees. Transition into plyometric exercises like box jumps and depth jumps to enhance explosivity. Incorporate weighted exercises such as squats and deadlifts to build foundational strength. Finish with conditioning drills, such as sprints and lateral bounds, to improve speed and agility. Aim for 3-4 sets of 8-12 repetitions for strength exercises and 3-5 sets of 10-15 reps for plyometric drills. Ensure proper form and hydration to maximize performance and safety;

8.2 Day 2: Upper Body Focus

Day 2 focuses on building explosive power in the upper body. Begin with a dynamic warm-up, including arm circles and shoulder rolls. Transition into plyometric exercises like medicine ball throws and plyometric push-ups to enhance upper body explosiveness. Incorporate strength training with bench presses and pull-ups to build muscular endurance. Finish with conditioning drills such as sled pushes and battle ropes to improve endurance and power. Aim for 3-4 sets of 8-12 repetitions for strength exercises and 3-5 sets of 10-15 reps for plyometric drills. Prioritize proper form, hydration, and rest periods to optimize performance and safety.

8.3 Day 3: Active Recovery

Active recovery on Day 3 focuses on promoting muscle repair and maintaining mobility without intense exertion. Begin with light cardio such as jogging or cycling at a low intensity for 15-20 minutes. Include dynamic stretching exercises like arm circles, leg swings, and torso twists to improve flexibility. Incorporate yoga or Pilates to enhance core stability and reduce muscle tension. Finish with foam rolling or self-myofascial release to target key muscle groups; Aim to keep the session at 30-45 minutes, ensuring adequate rest and hydration to support recovery. This day is crucial for long-term performance and injury prevention in explosive training programs.

Advanced Training Techniques

Advanced techniques like periodization and progressive overload enhance explosive power by systematically increasing intensity and volume, optimizing performance while minimizing injury risks through structured progression.

9.1 Periodization

Periodization involves structuring training into phases to optimize performance and recovery. It alternates intense workout periods with recovery phases, preventing overtraining and enhancing explosive power development. This method ensures athletes peak at critical moments, balancing strength, speed, and endurance. By varying volume and intensity, periodization promotes long-term progress and reduces injury risks, making it a cornerstone of advanced training strategies for explosive workouts.

9.2 Progressive Overload

Progressive overload is a training principle that involves gradually increasing the intensity of workouts to challenge muscles and enhance explosive power. This can be achieved by adding weight, reps, or reducing rest time. Consistently applying progressive overload ensures continued strength gains and avoids plateaus. It also helps improve neuromuscular coordination, essential for explosive movements. To implement this effectively, track progress and adjust loads safely to prevent overtraining. Regularly incorporating progressive overload into explosive workout programs maximizes results and supports long-term athletic development, making it a key strategy for advanced training.

An explosive workout program is a powerful tool for enhancing strength, speed, and agility. By incorporating plyometrics, strength training, and conditioning drills, individuals can achieve significant improvements in athletic performance. Consistency, proper nutrition, and recovery are essential for maximizing results. The strategies outlined in this guide provide a comprehensive approach to building explosive power. Whether for sports or personal fitness, adhering to these principles will help unlock your full potential. Embrace the challenge, stay committed, and watch your abilities transform over time. The journey to explosive fitness is rewarding and achievable with dedication and the right approach.

the man’s guide to women pdf

Discover the science-backed secrets to understanding women, attraction, and relationships․ This guide, based on 40 years of research, offers insights into female psychology and building lasting connections․

1․1 Overview of the Book

The Man’s Guide to Women is a comprehensive guide based on 40 years of research by Dr․ John Gottman and his team․ It unlocks the mysteries of female psychology, offering insights into attraction, relationships, and intimacy․ The book provides practical advice on understanding women’s needs, effective communication, and building lasting connections․ Covering topics like courtship, emotional intimacy, and conflict resolution, it equips men with tools to succeed in relationships․ Available in PDF, EPUB, and Kindle formats, this research-backed guide is essential for men seeking to understand and connect with women on a deeper level․ It’s a scientifically proven roadmap to fostering love and satisfaction․

1․2 Authors and Their Expertise

The Man’s Guide to Women is authored by renowned relationship expert Dr․ John Gottman, alongside Julie Schwartz Gottman, Douglas Abrams, and Rachel Carlton Abrams․ Dr․ Gottman’s 40 years of research from his Love Lab provides the foundation for this book․ Known for his groundbreaking work in relationship dynamics, Gottman is a trusted authority in understanding human connections․ His expertise, combined with contributions from other specialists, ensures a well-rounded perspective on male-female relationships․ The authors’ collective knowledge offers actionable insights, making the book a reliable resource for men seeking to improve their relationships․

1․3 Key Takeaways for Men

The Man’s Guide to Women provides men with practical insights to build lasting relationships․ Key takeaways include understanding female psychology, mastering effective communication, and recognizing the importance of emotional intimacy․ The book emphasizes leadership without control and support without losing identity․ It offers strategies for planning perfect dates, interpreting female signals, and achieving physical satisfaction․ By addressing communication gaps and conflict resolution, men can overcome challenges and foster deeper connections․ The guide encourages transparency, vulnerability, and mutual respect, helping men become the partners women desire․ These lessons, backed by decades of research, empower men to create fulfilling, long-term relationships․

Understanding Female Psychology

The Man’s Guide to Women reveals insights into female emotions, desires, and behaviors․ It explores what women truly want, their emotional needs, and triggers of attraction, providing men with a clear understanding of female psychology to foster meaningful connections and relationships․

2․1 What Women Really Want

According to The Man’s Guide to Women, women desire emotional connection, trust, and respect in relationships․ They seek partners who understand their needs and can communicate effectively․ The book highlights that women value men who are supportive, reliable, and able to foster intimacy without compromising their own identity․ It also emphasizes that women want to feel appreciated and heard, which are foundational for building a lasting bond․

The guide underscores that women are drawn to men who can balance strength with vulnerability, demonstrating leadership without control․ By addressing these core desires, men can create fulfilling and meaningful relationships that satisfy both partners emotionally and physically․

2․2 Triggers of Attraction

According to The Man’s Guide to Women, attraction is deeply rooted in emotional connection and mutual understanding․ Men who demonstrate confidence, emotional intelligence, and a genuine interest in a woman’s thoughts and feelings are more likely to trigger attraction․ The book reveals that women are drawn to men who can balance strength with vulnerability, showing both leadership and sensitivity․ Shared values, respect, and the ability to communicate effectively also play a significant role in sparking attraction․ By understanding these triggers, men can create a strong foundation for meaningful connections that go beyond superficial appeal․

Emotional intimacy and authenticity are key factors in sustaining attraction, as women often seek partners who can engage deeply and sincerely․

2․3 Emotional Needs in Relationships

Understanding a woman’s emotional needs is crucial for building a fulfilling relationship․ According to The Man’s Guide to Women, women often seek emotional connection, validation, and support․ They value men who can listen actively, show empathy, and provide a sense of security․ Feeling appreciated and understood are key emotional needs that, when met, foster trust and intimacy․ The book emphasizes the importance of creating a safe space for open communication, where both partners feel heard and valued․ By addressing these emotional needs, men can strengthen their connection and create a foundation for a meaningful and lasting relationship․

Building a Connection

Building a connection involves effective communication and shared activities that foster mutual respect and trust․ These elements, as outlined in the book, create a strong foundation for relationships․

3․1 Effective Communication

Effective communication is the cornerstone of building a connection․ The book emphasizes active listening, expressing emotions clearly, and being transparent․ These strategies foster trust and understanding, crucial for relationships․ Men are encouraged to communicate openly, even when uncomfortable, ensuring both partners feel heard․ By doing so, they create a safe environment for emotional intimacy, which is vital for long-term satisfaction․ The guide provides practical tips on how to navigate conversations, avoid misunderstandings, and strengthen the bond with their partner through thoughtful dialogue․ This approach helps men connect on a deeper level, leading to more fulfilling relationships․

3․2 Shared Activities and Interests

Shared activities and interests are vital for building a strong connection with a woman․ Engaging in common hobbies or exploring new experiences together fosters mutual understanding and bonding․ By participating in activities she enjoys, men demonstrate care and interest in her passions․ This not only strengthens the relationship but also creates shared memories and a sense of unity․ The guide emphasizes the importance of supporting her interests and being open to trying new things together․ This approach helps men connect on a deeper level, fostering a sense of partnership and teamwork․ Shared experiences become the foundation for a meaningful and fulfilling relationship․

The Role of Men in Relationships

Men play a crucial role in relationships by providing leadership without control and offering emotional support while maintaining their own identity, fostering a balanced partnership․

4․1 Leadership Without Control

Leadership in relationships involves guiding with confidence and respect, not dominance․ Men can lead by setting a positive tone, making thoughtful decisions, and encouraging open communication․ This approach fosters mutual respect and collaboration, allowing both partners to feel valued and heard․ By leading without control, men create a balanced dynamic where their partner feels empowered, not dictated to․ This chapter explores practical strategies for men to embrace leadership while maintaining equality, ensuring relationships are built on trust and teamwork rather than hierarchy or manipulation․

4․2 Support Without Losing Identity

Supporting a partner without losing your identity is crucial for a healthy relationship․ Men can provide emotional backing and encouragement while maintaining their own interests and goals․ This balance ensures mutual growth and prevents codependency․ By setting boundaries and communicating openly, men can support their partner’s needs without compromising their own sense of self․ The book emphasizes the importance of maintaining individuality, as a strong sense of identity fosters respect and attraction in a relationship․ This chapter offers practical advice on how to nurture your partner while staying true to yourself, creating a partnership of equals․

Navigating Courtship and Dating

Master the art of successful courtship with science-based strategies․ Learn effective approaches to dating, understanding female signals, and building meaningful connections that lead to lasting relationships․

5․1 Planning the Perfect Date

Planning the perfect date is crucial for creating a memorable and meaningful connection․ According to The Man’s Guide to Women, understanding a woman’s preferences and interests is key․ Research suggests that personalization is essential—whether it’s choosing a venue, activity, or setting the right ambiance․ The book emphasizes the importance of showing genuine effort and thoughtfulness, as this demonstrates commitment and care․ Additionally, communication plays a vital role; being attentive to her cues and needs ensures the date is enjoyable for both parties․ By aligning the date with her personality and desires, men can foster a deeper sense of connection and intimacy, setting the foundation for a lasting relationship․ Remember, it’s about creating shared experiences that resonate emotionally, not just impressing with grand gestures․ The guide provides practical tips on how to strike this balance effectively, ensuring that every moment counts and leaves a lasting impression․

5․2 Understanding Female Signals

Understanding female signals is a cornerstone of successful communication and connection․ According to The Man’s Guide to Women, men must learn to interpret both verbal and non-verbal cues, such as body language, tone, and context, to accurately gauge a woman’s interest or discomfort․ The book emphasizes that women often communicate subtly, and missing these signals can lead to misunderstandings․ By paying attention to these indicators, men can better respond to her needs, build trust, and foster a deeper connection․ The guide provides insights into recognizing and decoding these signals, helping men navigate relationships with empathy and awareness, leading to more fulfilling and satisfying partnerships․

Intimacy and Satisfaction

Intimacy and satisfaction are crucial for a fulfilling relationship․ The book explores how emotional connection and physical chemistry combine to create deep, lasting intimacy, ensuring mutual fulfillment for both partners․

6․1 The Importance of Emotional Intimacy

Emotional intimacy is the cornerstone of a satisfying relationship․ It fosters trust, vulnerability, and a deep sense of connection․ By understanding and nurturing emotional bonds, men can create a safe space where women feel valued and secure․ This chapter highlights how emotional intimacy strengthens relationships, providing practical tips on communication and empathy․ Building this connection ensures mutual understanding and paves the way for lasting love and fulfillment․

6․2 Tips for Physical Satisfaction

Physical satisfaction is a vital aspect of any relationship, requiring mutual understanding and communication․ The book emphasizes the importance of emotional connection as a foundation for intimacy․ It provides practical advice on how to create a fulfilling experience, ensuring both partners feel valued and satisfied․ By focusing on trust, attentiveness, and open dialogue, men can enhance physical intimacy, leading to deeper connection and mutual pleasure․ These insights help men understand women’s needs and desires, fostering a more intimate and rewarding relationship․

Overcoming Relationship Challenges

Addressing conflicts and communication gaps is essential for maintaining healthy relationships․ The book offers strategies to resolve disagreements and foster mutual respect, ensuring lasting harmony and understanding․

7․1 Addressing Communication Gaps

Effective communication is the cornerstone of any successful relationship․ The book emphasizes the importance of active listening and empathy in bridging communication gaps․ Men are encouraged to express themselves honestly while creating a safe space for their partners to share their thoughts and feelings․ By understanding each other’s emotional needs and adopting a non-defensive approach to conversations, couples can resolve conflicts more efficiently․ Gottman’s research highlights practical techniques to improve dialogue, ensuring both partners feel heard and valued․ This chapter provides actionable strategies to overcome misunderstandings and strengthen emotional bonds, fostering a deeper connection in the relationship․

7․2 Conflict Resolution Strategies

The Man’s Guide to Women provides practical strategies for resolving conflicts in relationships․ The book emphasizes the importance of remaining calm and avoiding criticism or contempt․ Men are encouraged to approach disagreements with empathy and understanding, focusing on solutions rather than “winning” arguments․ Gottman’s research suggests that couples who practice de-escalation techniques and prioritize mutual respect are more likely to resolve conflicts effectively․ By addressing issues constructively and seeking common ground, men can strengthen their connection with their partner․ This chapter offers actionable advice to navigate disagreements and foster a harmonious relationship, ensuring both partners feel valued and heard․ Conflict resolution becomes an opportunity for growth and deeper understanding․

The Man’s Guide to Women concludes by summarizing key insights from 40 years of research․ It empowers men to understand female psychology, fostering attraction, intimacy, and lasting relationships․ The book encourages men to apply these science-backed strategies, leading to personal growth and fulfilling partnerships․ By embracing emotional intelligence and effective communication, men can transform their relationships and achieve happiness․

8․1 Summarizing Key Lessons

The Man’s Guide to Women distills 40 years of research into actionable insights․ It reveals that understanding female psychology is key to building lasting connections․ Men learn to recognize triggers of attraction, communicate effectively, and lead without controlling․ Emotional intelligence and intimacy are emphasized as vital for satisfaction․ The book also highlights the importance of balancing support with maintaining one’s identity․ By mastering these strategies, men can navigate relationships with confidence and empathy, fostering deeper connections and mutual fulfillment․ The key takeaway is that relationships thrive when men embrace emotional intelligence and science-backed approaches to understanding women․

8․2 Encouragement for Action

Men are empowered to take charge of their relationships with science-backed insights․ The book motivates men to embrace emotional intelligence, communication, and leadership․ By applying these strategies, they can build meaningful connections and foster mutual satisfaction․ It’s a call to action for men to invest in personal growth and understanding․ The key is to approach relationships with empathy, confidence, and a willingness to learn․ With the tools provided, men can create lasting, fulfilling partnerships․ The guide encourages men to step up, take responsibility, and prioritize emotional intimacy, ensuring relationships thrive for a lifetime․

vintage blow mold collectors guide

Vintage blow mold collecting offers a nostalgic journey into seasonal decorations‚ blending history‚ design‚ and charm. These iconic plastic molds‚ often lit from within‚ captivate collectors with their retro appeal and the satisfaction of preserving a bygone era’s festive spirit.

What Are Vintage Blow Molds?

Vintage blow molds are hollow‚ plastic decorations made using a blow molding process. Often illuminated from within‚ they feature seasonal designs like snowmen‚ Santas‚ or ghosts; Produced by companies such as Empire‚ Union Products‚ and General Foam Plastics‚ these molds were popular for outdoor and indoor holiday displays. Made from durable plastic‚ they were designed to withstand weather and last for years. Today‚ they are highly sought after by collectors for their nostalgic charm‚ retro designs‚ and craftsmanship‚ making them cherished pieces of seasonal decor history.

Why Collect Vintage Blow Molds?

Collectors are drawn to vintage blow molds for their nostalgic charm‚ durability‚ and unique designs. These molds‚ often featuring iconic holiday characters‚ evoke memories of festive traditions. Their sturdy plastic construction ensures longevity‚ making them treasured family heirlooms. The process of restoring and displaying these pieces adds a personal touch‚ while the thrill of the hunt for rare designs enhances the collecting experience‚ blending nostalgia with a passion for preserving seasonal decor history.

The History of Blow Mold Decorations

Blow mold decorations emerged in the mid-20th century‚ becoming a staple in seasonal displays. Made from durable plastic‚ these molds were produced by companies like Empire‚ Union Products‚ and General Foam Plastics. Originally designed for outdoor use‚ they featured festive themes such as Christmas‚ Halloween‚ and Easter. Their popularity peaked in the 1950s-1980s‚ with intricate designs and illuminated features. Over time‚ production shifted to overseas manufacturers‚ but vintage molds have seen a resurgence in collectibility‚ cherished for their nostalgic charm and historical significance in seasonal decor.

Popular Manufacturers of Vintage Blow Molds

Leading manufacturers like Empire‚ Union Products‚ and General Foam Plastics pioneered blow mold production‚ creating iconic seasonal decorations that remain highly collectible and cherished today.

Empire Blow Molds

Empire Blow Molds are highly sought after by collectors for their vibrant designs and durability. Known for their detailed holiday-themed pieces‚ Empire produced iconic decorations like snowmen‚ Santas‚ and reindeer. Their molds often feature bold colors and intricate details‚ making them stand out; Collectors prize Empire Blow Molds for their nostalgic appeal and the high-quality craftsmanship that has withstood the test of time. These pieces remain a cornerstone of any vintage blow mold collection‚ capturing the essence of festive traditions.

Union Products

Union Products is a beloved name among vintage blow mold enthusiasts‚ known for its colorful and intricate designs. Their blow molds‚ often featuring iconic holiday characters like ghosts‚ pumpkins‚ and snowmen‚ are highly sought after for their nostalgic charm. Union Products’ attention to detail and durable construction have made their pieces enduring favorites. Collectors cherish these molds for their retro aesthetic and the memories they evoke‚ making them a staple in many vintage collections. Their designs continue to captivate holiday decorators and collectors alike.

General Foam Plastics

General Foam Plastics is renowned for producing high-quality blow molds that have become collector favorites. Their designs‚ such as snowmen‚ Santas‚ and seasonal characters‚ are celebrated for their durability and intricate details. Collectors often seek out General Foam Plastics molds for their vibrant colors and nostalgic appeal. These pieces are considered the “gold standard” by many enthusiasts due to their superior craftsmanship and timeless charm‚ making them a cornerstone of any vintage blow mold collection.

How to Identify Vintage Blow Molds

Identifying vintage blow molds involves checking for manufacturer markings‚ date codes‚ and distinct design characteristics that reflect their era‚ ensuring authenticity and value for collectors.

Manufacturer Markings and Labels

Manufacturer markings are crucial for identifying vintage blow molds. Look for logos‚ stamps‚ or embossed text on the bottom or back‚ as companies like Empire‚ Union Products‚ and General Foam Plastics often labeled their pieces. Empire molds typically feature a crown logo‚ while Union Products may have “Union Products” stamped. General Foam Plastics often used “GFP” or “General Foam.” These markings are essential for verifying authenticity and determining the mold’s origin‚ making them invaluable for serious collectors seeking genuine vintage items.

Date Codes and Patents

Date codes and patents are key to verifying the age and authenticity of vintage blow molds. Many manufacturers‚ such as Empire and Union Products‚ included date codes or patent numbers on their pieces. These codes‚ often found on the underside or back‚ help determine the production year. Patents also provide insight into the mold’s design origins; Collectors should look for embossed or printed markings‚ as their presence confirms the mold’s vintage status and can influence its value and rarity in the collector’s market.

Design Characteristics and Colors

Vintage blow molds are renowned for their vibrant colors and intricate designs‚ often featuring seasonal themes like snowmen‚ pumpkins‚ or Santas. Early molds boast bold‚ bright hues‚ while later designs transitioned to softer‚ more muted tones. Their classic shapes and detailed expressions evoke a nostalgic charm. Collectors prize these pieces for their unique aesthetic‚ which reflects the era’s design sensibilities. The interplay of color and form makes vintage blow molds highly desirable‚ blending functionality with artistic appeal for holiday displays and collections.

Collecting Tips for Beginners

Start by researching popular manufacturers and identifying rare pieces. Inspect condition‚ look for original packaging‚ and authenticate through markings or date codes. Build your collection patiently‚ focusing on pieces that resonate with your personal style‚ and enjoy the journey of preserving these nostalgic decorations.

Where to Find Vintage Blow Molds

Vintage blow molds can be found on platforms like eBay and Etsy‚ where sellers often list rare and collectible pieces. Flea markets‚ antique stores‚ and yard sales are also great places to hunt for these treasures. Additionally‚ collector communities and forums can connect you with enthusiasts selling or trading molds. Some rare pieces may also appear in estate sales or auctions. When shopping online‚ use specific keywords like “vintage blow mold” or “rare holiday mold” to find authentic items. Be cautious of reproductions and always verify authenticity through manufacturer markings or date codes to ensure you’re purchasing genuine vintage pieces. Building relationships with sellers and other collectors can also lead to discovering hidden gems‚ making the hunt both rewarding and enjoyable. By exploring these avenues‚ you can grow your collection with unique and meaningful vintage blow molds.

How to Determine Authenticity

To ensure your vintage blow mold is authentic‚ look for manufacturer markings like Empire‚ Union Products‚ or General Foam Plastics. Check for date codes or patents‚ as older molds often have embossed dates. Be wary of barcodes‚ as they indicate post-1970s production. Examine the design and color schemes‚ as vintage molds have distinct aesthetics. Compare your finds with price guides and auction listings to verify authenticity. Join collector communities for expert insights and to avoid common pitfalls in identifying genuine vintage pieces.

Common Mistakes to Avoid

When collecting vintage blow molds‚ avoid assuming all old-looking pieces are authentic. Be cautious of reproductions and overly low prices that may indicate fake items. Never overlook manufacturer markings or date codes‚ as these are crucial for verifying authenticity. Avoid relying solely on seller descriptions and always inspect items for signs of aging‚ such as yellowing or cracks. Lastly‚ steer clear of pieces with modern barcodes‚ as these signify newer production. Educate yourself and seek expert opinions to make informed decisions.

Restoring and Maintaining Vintage Blow Molds

Gently clean with mild soap and soft brushes to avoid damage. Avoid harsh chemicals and abrasive materials that can harm the plastic. For repairs‚ use epoxy or plastic welds‚ and repaint with matching colors. Store in protective cases or boxes to prevent breakage and fading. Regular maintenance ensures your collection remains vibrant and intact for years to come‚ preserving its nostalgic charm and value.

Cleaning and Repair Techniques

Cleaning vintage blow molds requires gentle care. Use mild soap and soft-bristled brushes to remove dirt without damaging surfaces. Avoid harsh chemicals or abrasive materials. For repairs‚ apply epoxy or plastic welds to cracks or breaks. Repaint with original color matches to maintain authenticity. For electrical components‚ ensure all connections are secure and test functionality before display. Regular cleaning and careful repairs preserve the integrity and extend the life of these cherished collectibles‚ keeping them vibrant for future generations.

Painting and Touch-Up Tips

When restoring vintage blow molds‚ use high-quality acrylic paints that match the original colors. Apply thin coats to avoid drips and ensure even coverage. For intricate details‚ use small brushes to replicate the original design. Avoid over-painting‚ as it can erase the mold’s vintage charm. Lightly sand rough areas before painting for better adhesion. Touch up only damaged or faded sections to preserve authenticity. Allow paint to fully dry between coats and seal with a clear matte spray for lasting protection.

Storage and Display Ideas

Store vintage blow molds in a cool‚ dry place to prevent warping or cracking. Use acid-free paper or cloth to wrap each piece. Avoid stacking to prevent damage. For display‚ consider glass-front cabinets or shelves to showcase your collection while protecting it from dust. Rotate your display seasonally to highlight different pieces. Group similar-themed molds together for a cohesive look. Consider using LED lighting to enhance their vintage glow without generating heat.

Valuing Your Collection

Vintage blow molds gain value based on rarity‚ condition‚ and demand. Rare designs and mint condition pieces fetch higher prices‚ especially those from iconic manufacturers like Empire or General Foam Plastics.

Understanding Market Trends

Market trends for vintage blow molds are influenced by rarity‚ condition‚ and seasonal demand. Prices surge during holidays‚ with Christmas and Halloween molds being most sought after. Social media platforms like Etsy and eBay showcase high-value pieces‚ driving collector interest. Rare designs‚ such as full nativity scenes‚ command premium prices‚ while mint-condition items retain higher value. The nostalgia factor and resurgence of retro decor also fuel demand‚ making vintage blow molds a lucrative collectible category.

Price Guides and Auctions

Price guides and auctions are essential tools for determining the value of vintage blow molds. Platforms like eBay and Etsy often feature high-value pieces‚ with rare designs fetching premium prices. Auction sites reflect current market trends‚ showing which molds are in demand. Collectors can use these resources to track pricing and identify rare finds. For instance‚ vintage Santa sets or complete nativity scenes often sell for hundreds of dollars. Utilizing price guides helps collectors make informed decisions and avoid overpaying for items.

Rare and Highly Sought-After Pieces

Rare and highly sought-after vintage blow molds are the holy grail for collectors. Full nativity scenes‚ intricate designs‚ and early production runs are particularly valuable. Empire Santa molds and vintage Halloween blow molds‚ such as glowing ghosts and pumpkins‚ are in high demand. These rare pieces often fetch premium prices at auctions and online marketplaces. Collectors are also on the lookout for mint-condition items with original lighting‚ as these retain the highest value and nostalgic appeal.

Vintage Blow Molds for Specific Holidays

Vintage blow molds are beloved for holiday-specific designs‚ such as Christmas‚ Halloween‚ and Easter. These decorations‚ often lit from within‚ bring nostalgic charm to seasonal displays‚ making them highly sought after by collectors for their unique themes and festive appeal.

Christmas-Themed Blow Molds

Christmas-themed blow molds are among the most popular and iconic designs‚ featuring festive characters like Santas‚ reindeer‚ snowmen‚ and nativity scenes. These molds‚ often illuminated from within‚ bring a nostalgic charm to holiday displays. Popular manufacturers like Empire‚ Union Products‚ and General Foam Plastics produced these treasures‚ with intricate details and vibrant colors. Collectors seek rare and complete sets‚ such as full nativity scenes or animated designs‚ which can command high prices due to their sentimental value and historical significance.

Halloween-Themed Blow Molds

Halloween-themed blow molds captivate collectors with their spooky charm‚ featuring iconic designs like glowing jack-o’-lanterns‚ ghostly figures‚ and eerie black cats. These molds often light up‚ adding a haunting ambiance to seasonal displays. Rare and well-preserved pieces‚ such as animated or intricately detailed designs‚ are highly sought after. Collectors appreciate their nostalgic appeal and the challenge of finding complete‚ unrestored sets. Online communities and forums often highlight these molds‚ sharing restoration tips and showcasing their eerie beauty.

Other Seasonal and Holiday Molds

Beyond Christmas and Halloween‚ vintage blow molds celebrate various holidays and seasons‚ such as Easter‚ Thanksgiving‚ and patriotic themes. These molds feature festive designs like bunnies‚ turkeys‚ and eagles. While less common than Christmas molds‚ they offer unique charm and diversity to collections. Collectors often seek these for their nostalgic value and to decorate throughout the year. Prices vary‚ but rare or well-preserved pieces can be highly sought after. They add a delightful touch to seasonal displays and are a great way to expand a collection.

The Community of Blow Mold Collectors

The community of blow mold collectors is vibrant‚ with online forums‚ social media groups‚ and annual meetups fostering connections. Enthusiasts share discoveries‚ restoration tips‚ and display ideas‚ creating a supportive environment for all.

Online Forums and Groups

Online forums and groups dedicated to vintage blow mold collecting have become hubs for enthusiasts. Platforms like eBay and Etsy host active communities‚ while social media groups such as “Blowmolds” and “A Very Vintage Halloween” unite thousands of collectors. These spaces allow members to share discoveries‚ restoration tips‚ and display ideas. Collectors showcase their collections‚ inspiring others and fostering a sense of camaraderie. Such forums are invaluable for learning‚ trading‚ and connecting with fellow enthusiasts who share a passion for these nostalgic decorations.

Collector Events and Meetups

Collector events and meetups are vibrant gatherings where enthusiasts showcase their vintage blow molds. Often promoted through online forums and social media groups‚ these events offer opportunities to trade‚ learn about restoration techniques‚ and admire rare pieces. They foster a sense of community‚ allowing collectors to share their passion and nostalgia. Whether at annual conventions or specialized sales‚ these meetups are essential for networking and celebrating the art of vintage blow mold collecting.

Sharing Your Collection Online

Sharing your vintage blow mold collection online connects you with a global community of enthusiasts. Platforms like eBay‚ Etsy‚ and social media groups dedicated to blow mold collectors provide spaces to showcase your pieces. Online forums and groups‚ such as “Blow Mold United” and “A Very Vintage Halloween‚” allow collectors to share photos‚ stories‚ and tips. By posting your collection‚ you gain admiration‚ feedback‚ and opportunities to inspire others. It’s also a great way to build connections and contribute to the growing digital archive of vintage blow mold history.

The Future of Vintage Blow Mold Collecting

Vintage blow mold collecting continues to grow‚ driven by nostalgia and digital platforms. Enthusiasts are preserving seasonal decor history‚ inspiring new generations to embrace these retro treasures.

Trends in Collecting

Collectors are increasingly drawn to rare‚ seasonal blow molds‚ with nostalgia driving demand. Social media platforms showcase collections‚ inspiring new enthusiasts; Online marketplaces like eBay and Etsy have made finding vintage pieces easier‚ while forums and groups foster community. Seasonal themes‚ especially Halloween and Christmas‚ remain popular. Rare and unique designs‚ such as nativity scenes or animatronic figures‚ fetch higher prices. The trend also highlights a preference for original‚ unrestored pieces‚ emphasizing authenticity and historical value over modern replicas.

Modern Replicas vs. Vintage Originals

Modern replicas of blow molds offer durability and affordability but lack the nostalgic charm of vintage originals. While replicas replicate classic designs‚ they often miss the unique imperfections and patina that define vintage pieces. Collectors prioritize original molds for their historical value and craftsmanship. Modern versions‚ however‚ appeal to those seeking functional decorations without the hunt for rare antiques. The debate between the two highlights a balance between preserving the past and embracing convenient‚ modern alternatives for seasonal decor enthusiasts.

Passing the Hobby to the Next Generation

Engaging younger collectors is vital for preserving the legacy of vintage blow mold collecting. Social media platforms and online forums have become powerful tools‚ connecting enthusiasts across generations. Sharing collections and stories online inspires newcomers‚ while educational content about the history and value of blow molds fosters appreciation. Encouraging younger family members to participate in hunts and restorations ensures the hobby’s continuity. Building a community that bridges age gaps guarantees that vintage blow molds will remain cherished for years to come.

2007 ford f150 wiring diagram pdf

The 2007 Ford F-150 wiring diagrams provide a detailed guide to understanding the truck’s electrical system, essential for repairs, modifications, and troubleshooting. These diagrams are crucial for mechanics and DIY enthusiasts, offering clear visuals of wire connections, circuits, and components. Available in PDF format, they cover engine, interior, and exterior systems, ensuring accurate diagnoses and installations. This resource is indispensable for maintaining and upgrading your vehicle effectively.

Overview of the Importance of Wiring Diagrams

Wiring diagrams are essential for understanding and working with the electrical systems of the 2007 Ford F-150. They provide a visual representation of wire connections, circuits, and components, making it easier to diagnose and repair issues. These diagrams are critical for mechanics and DIY enthusiasts, as they help identify specific wires, fuses, and relays related to various systems. By referencing a wiring diagram, users can safely perform modifications, troubleshoot faults, and ensure proper installations. They also reduce the risk of electrical damage or safety hazards. With detailed schematics, wiring diagrams save time and effort, making them an indispensable tool for maintaining and upgrading the vehicle. Their accuracy and clarity ensure reliable results, whether addressing complex electrical problems or routine maintenance tasks.

Key Components of a Wiring Diagram

A wiring diagram for the 2007 Ford F-150 includes essential components that help users understand the electrical system. These components feature symbols representing wires, connectors, and electrical devices like fuses, relays, and switches. Color-coded wires are clearly indicated, simplifying circuit identification and troubleshooting. The diagram also outlines connectors and harnesses, showing how systems like the engine, interior, and exterior lighting are interconnected. A legend or key is often provided to explain symbols and abbreviations, ensuring clarity. These elements work together to create a comprehensive guide, enabling users to trace circuits, identify components, and perform repairs accurately. The detailed structure of the wiring diagram ensures that even complex electrical systems are accessible for diagnosis and maintenance.

Understanding the 2007 Ford F-150 Electrical System

The 2007 Ford F-150 electrical system is a complex network of wiring, circuits, and components. It powers everything from engine functions to interior accessories, ensuring reliable operation. Proper understanding requires consulting wiring diagrams to trace connections and identify components like fuses, relays, and grounds. This knowledge is essential for troubleshooting and maintaining the vehicle’s electrical health, ensuring safety and performance. Accurate diagrams guide repairs and modifications, making them indispensable for owners and technicians alike.

Power Distribution and Grounding

The 2007 Ford F-150’s electrical system relies on a well-organized power distribution and grounding setup. Power is distributed through the battery, alternator, and main junction boxes, ensuring reliable energy supply to all components. Fuses and relays act as critical protectors, preventing overloads and short circuits. The grounding system is equally important, with multiple ground points throughout the vehicle, including the battery, engine block, and chassis, ensuring proper current flow and component protection. Proper grounding prevents electrical noise and malfunctions, while the distribution system ensures power reaches every necessary circuit. Consulting the wiring diagram is essential to trace these connections accurately and perform repairs or modifications safely and effectively. Understanding this setup is vital for maintaining the truck’s electrical health and functionality.

Fuses and Relays: Location and Function

The 2007 Ford F-150 uses a combination of fuses and relays to protect and control its electrical systems. Fuses are located in the driver-side instrument panel and under-hood fuse boxes, acting as circuit protectors against overloads. Relays, such as the fuel pump and AC compressor relays, are typically found in the under-hood junction box and serve as electronic switches to activate high-power components. The wiring diagram provides detailed locations and functions, helping identify specific fuses and relays for systems like the fuel pump, power windows, and 4WD. Proper understanding of these components is essential for diagnosing and repairing electrical issues, ensuring the truck’s systems operate safely and efficiently. Always refer to the diagram to locate and test fuses and relays accurately.

Wiring Colors and Codes

The 2007 Ford F-150 wiring diagrams utilize a standardized color-coding system to simplify circuit identification. Each wire’s color corresponds to its function, such as red for power sources, yellow for signal circuits, and black for grounds. This coding is consistent across all vehicle systems, from the engine compartment to interior accessories. The diagrams provide a key to decipher these colors, making it easier to trace circuits and diagnose issues. For example, a yellow wire with a red stripe might indicate a specific signal path, while a solid brown wire could denote a ground connection. Understanding these codes is crucial for accurate repairs and modifications, ensuring that connections are made safely and correctly. Always refer to the wiring diagram’s color key for precise identification and to avoid potential electrical system damage.

2007 Ford F-150 Wiring Diagram Sections

The 2007 Ford F-150 wiring diagram is divided into key sections, including engine compartment, interior, exterior lighting, and 4WD systems, providing detailed guides for repairs and upgrades.

Engine Compartment Wiring

The engine compartment wiring section of the 2007 Ford F-150 wiring diagram provides detailed information about the electrical connections for the engine and related components. This includes the fuel pump wiring, ignition system, and sensor connections. The diagram outlines the wiring for the 5.4L V8 engine, showcasing how components like the fuel pump relay, oxygen sensors, and coolant temperature sensor are interconnected. It also highlights the fuse and relay locations within the engine compartment, essential for troubleshooting issues like a faulty fuel pump or ignition problems. The wiring colors and codes are clearly labeled, making it easier to identify specific circuits. This section is crucial for diagnosing engine-related electrical issues and ensuring proper repairs or modifications. By referring to this diagram, mechanics and DIY enthusiasts can efficiently trace wiring paths and resolve common problems. It is a vital resource for maintaining the truck’s performance and reliability.

Interior and Dashboard Wiring

The interior and dashboard wiring section of the 2007 Ford F-150 wiring diagram details the electrical connections for the truck’s cabin systems. This includes wiring for the stereo, HVAC controls, and dashboard instruments. The diagram outlines the circuits for power windows, door locks, and the steering wheel controls, making it easier to diagnose issues like faulty switches or blown fuses. It also covers the wiring for interior lighting, including dome and cargo lights, and the electrical connections for gauges and warning lights on the dashboard. The fuse box locations and relay assignments are clearly marked, helping users identify and resolve problems quickly. This section is essential for troubleshooting interior electrical issues and ensuring proper functionality of convenience features. By referencing this diagram, users can confidently repair or modify their truck’s interior systems with precision. It is a comprehensive guide for maintaining the truck’s interior electrical components.

Exterior Lighting and Signal Wiring

The 2007 Ford F-150 wiring diagram provides detailed information on the exterior lighting and signal systems. This section covers the wiring for headlights, taillights, brake lights, and turn signals, ensuring proper functionality and safety. The diagram outlines the circuits for fog lights, reverse lights, and side markers, making it easier to identify issues like faulty bulbs or wiring faults. It also includes the wiring for the third brake light and trailer tow lighting, essential for towing setups. The diagram specifies the wiring colors and codes for each component, aiding in quick repairs. Additionally, it details the connections for the exterior lighting control modules and wiring connectors. This section is vital for diagnosing and repairing exterior lighting issues, ensuring your truck remains visible and compliant with safety standards. It is a must-reference guide for maintaining proper lighting and signaling systems on your 2007 Ford F-150.

4WD System Wiring

The 2007 Ford F-150 4WD system wiring diagram is essential for understanding the electrical components that control the four-wheel-drive functionality. This section details the wiring connections for the transfer case, electronic shift-on-the-fly module, and related sensors. It outlines the power and signal wiring for the 4WD control module, which manages the system’s operation. The diagram also covers the wiring for the dashboard switches, indicator lights, and fuses related to the 4WD system. Troubleshooting common issues, such as faulty sensors or wiring harness connections, is simplified with this guide. Additionally, it specifies the wiring colors and codes for each component, ensuring accurate repairs. This resource is crucial for maintaining and repairing the 4WD system, ensuring optimal performance in various driving conditions. It is a comprehensive guide for diagnosing and resolving electrical issues specific to the four-wheel-drive system of your truck.

Locating and Downloading the 2007 Ford F-150 Wiring Diagram PDF

The 2007 Ford F-150 wiring diagram PDF can be found on Ford’s official website, online forums, and third-party automotive databases. Use specific search terms for accurate results. Essential for repairs and modifications.

Official Ford Resources and Manuals

Ford provides official wiring diagrams through its online resources and manuals. Visit Ford’s official website to access the Ford On-line Workshop Manual, which includes detailed wiring diagrams for the 2007 F-150. These diagrams are part of the official documentation and are reliable for repairs and modifications. Additionally, Ford dealerships can provide access to these manuals, either digitally or in print. For convenience, Ford also offers a clickable online version of the owner’s manual, which may include wiring information. Ensure to verify the source and model specificity when accessing these resources to avoid inaccuracies.

Online Forums and Communities

Online forums and communities are excellent resources for locating and downloading 2007 Ford F-150 wiring diagrams. Websites dedicated to Ford trucks, such as F-150 forums, often host detailed discussions and shared PDF files. Users frequently post wiring diagrams for specific systems, like the 4×4 setup or fuel pump, to help others troubleshoot or modify their vehicles. These communities are invaluable for DIY enthusiasts and mechanics, offering real-world insights and solutions. Additionally, forums like those focused on 2004-2008 F-150 models provide comprehensive wiring diagrams, which are often compatible with the 2007 model. By participating in these forums, you can access reliable and crowd-verified wiring diagrams, ensuring accuracy and relevance for your project. Always search with specific terms, such as “2007 Ford F-150 wiring diagram PDF,” for quick access to the most relevant resources.

Third-Party Websites and Databases

Third-party websites and databases offer a wealth of resources for accessing 2007 Ford F-150 wiring diagrams in PDF format. Platforms like ALLDATA and specialized automotive databases provide detailed electrical diagrams for various systems, including engine, interior, and exterior components. These sites often require a subscription or a one-time payment but are known for their accuracy and comprehensiveness. Additionally, wiring diagram-specific websites cater to DIY enthusiasts and professionals alike, offering downloadable PDFs for specific vehicle models. When using these resources, ensure the diagrams are compatible with your truck’s specifications, such as the 4WD system or V8-5;4L engine. Always verify the source’s reliability to avoid outdated or incorrect information, as this can lead to costly mistakes during repairs or modifications.

Reading and Interpreting the Wiring Diagram

Understanding symbols, color codes, and circuit paths is essential for interpreting the 2007 Ford F-150 wiring diagram. Identify components, trace connections, and verify wire colors for accurate diagnostics and repairs.

Understanding Symbols and Notations

Wiring diagrams for the 2007 Ford F-150 use standardized symbols to represent components like fuses, relays, and connectors. These symbols are essential for identifying parts and their functions within the electrical system; Color-coded wires are indicated, with each color corresponding to a specific circuit or system. For example, black wires often represent ground connections, while red wires may indicate power lines. The diagrams also include notation keys to decode abbreviations and labels, ensuring clarity. Understanding these symbols and notations is crucial for accurate diagnostics and repairs. Referencing the legend or key provided in the PDF ensures that users can interpret the diagrams correctly, avoiding confusion and potential errors during electrical work. This standardized approach makes the diagrams reliable and accessible for both professionals and DIY enthusiasts working on the 2007 F-150.

Identifying Specific Circuits and Components

Identifying specific circuits and components in the 2007 Ford F-150 wiring diagram is essential for targeted repairs and modifications. The PDF diagrams organize systems by categories, such as engine, interior, and exterior lighting, making it easier to locate relevant sections. Each circuit is depicted with labeled wires, connectors, and components, allowing users to trace connections and diagnose issues efficiently. Color-coded wires and standardized symbols help differentiate between power, ground, and signal lines. For example, the fuel pump circuit can be identified by tracing the wires from the fuel pump relay to the pump itself. By cross-referencing the diagram with the vehicle’s components, users can pinpoint faults and ensure accurate repairs. This methodical approach simplifies complex electrical systems, enabling users to address specific problems without unnecessary guesswork.

Troubleshooting Common Issues

The 2007 Ford F-150 wiring diagram is invaluable for diagnosing electrical system issues. Common problems, such as faulty fuel pumps or malfunctioning 4WD systems, can be traced using the diagram to identify disconnected or damaged wires. By referencing the wiring layout, users can pinpoint blown fuses, bad relays, or corroded connectors. For instance, if the fuel pump fails to activate, the diagram helps locate the relay and associated wiring for testing. Similarly, issues with the 4WD system can be resolved by verifying the wiring connections to the transfer case and control module. The diagrams provide a clear, step-by-step approach to troubleshooting, ensuring repairs are efficient and accurate. Regular consultation of the wiring diagram helps prevent misdiagnoses and reduces the risk of further damage to the vehicle’s electrical components.

Popular Wiring Diagrams for the 2007 Ford F-150

Key diagrams include fuel pump, stereo/accessory, and power window/lock wiring, essential for common repairs and upgrades. These schematics are widely sought for their clarity and detail.

Fuel Pump Wiring Diagram

The fuel pump wiring diagram for the 2007 Ford F-150 is a critical resource for diagnosing and repairing fuel system issues. This diagram outlines the electrical connections for the fuel pump, including the relay, fuse, and associated wiring. It shows how the powertrain control module (PCM) controls the pump’s operation through specific circuits. The diagram also highlights the fuel pressure sensor and its role in the system. By referencing this wiring diagram, technicians can identify faults such as open circuits or shorted wires that prevent the fuel pump from functioning properly. Additionally, it guides the replacement of components like the fuel pump relay or fuse, ensuring the system operates efficiently. This resource is indispensable for both professional mechanics and DIY enthusiasts tackling fuel-related problems in their F-150.

Stereo and Accessory Wiring

Stereo and Accessory Wiring

The stereo and accessory wiring diagram for the 2007 Ford F-150 is essential for installing or troubleshooting aftermarket audio systems and accessories. This diagram details the electrical connections for the stereo system, including the radio, speakers, and amplifier. It also covers wiring for auxiliary power outlets, USB ports, and other accessories. The diagram specifies the color codes for each wire, ensuring accurate connections. It is particularly useful for upgrading the sound system or adding features like Bluetooth or navigation. By following this wiring guide, users can avoid short circuits and ensure proper functionality. The diagram is available in PDF format, making it easy to reference and print. It is a valuable resource for both professional installers and DIY enthusiasts, providing clarity and precision for all audio-related modifications.

Power Window and Lock Wiring

The power window and lock wiring diagram for the 2007 Ford F-150 provides a detailed overview of the electrical circuits controlling these systems. This diagram is essential for diagnosing issues such as windows that won’t move or locks that malfunction. It illustrates the wiring connections for the power window motors, switches, and door lock actuators. The diagram also highlights the fuse and relay locations associated with these systems. By referencing the wiring colors and codes, users can identify specific circuits and ensure proper connections. This guide is particularly useful for repairing or replacing faulty components, such as switches or motors, and for understanding how the systems interact with the vehicle’s electrical network. Accurate wiring connections are critical to avoid short circuits and ensure reliable operation of the power windows and locks.

Tools and Software for Wiring Diagrams

Essential tools include multimeters, circuit testers, and wiring diagram software. PDF viewers like Adobe Acrobat and electrical diagram programs help navigate and edit wiring schematics efficiently for accurate diagnostics and repairs.

PDF Viewers and Editors

PDF viewers like Adobe Acrobat Reader and Foxit Reader are essential for accessing and viewing 2007 Ford F-150 wiring diagrams. These tools allow users to zoom, search, and bookmark specific sections for easier navigation. Editors such as Adobe Acrobat Pro or PDF-XChange enable users to annotate, highlight, and modify diagrams, which can be useful for marking repairs or customizations. Free alternatives like SumatraPDF and PDFarranger provide basic viewing and editing capabilities without the need for paid software. When working with wiring diagrams, these tools help users identify components, trace circuits, and understand complex electrical systems. They are indispensable for both professionals and DIY enthusiasts working on their vehicles, ensuring clarity and precision in repairs and modifications.

Electrical Diagram Software

Electrical diagram software is a powerful tool for creating, editing, and analyzing wiring diagrams for the 2007 Ford F-150. Programs like AutoCAD, Altium Designer, and CircuitStudio offer advanced features for designing and customizing electrical circuits. These tools are particularly useful for professionals and enthusiasts who need to modify or troubleshoot the truck’s wiring system. Free or low-cost alternatives, such as Fritzing or KiCad, are also available for DIY projects. These software options provide features like circuit simulation, real-time collaboration, and customizable templates, making it easier to identify and resolve electrical issues. By utilizing electrical diagram software, users can enhance their understanding of the F-150’s wiring system, ensuring precise repairs and modifications. Choosing the right software depends on the user’s skill level and specific needs, making it an essential resource for managing complex electrical systems effectively.

The 2007 Ford F-150 wiring diagram is a comprehensive resource for electrical system understanding. Always refer to official Ford manuals or trusted sources for accuracy. Use proper tools and follow safety guidelines when working with wiring to avoid damage or injury. Regularly update your knowledge and consult online forums for troubleshooting tips. Safe and effective electrical work ensures your truck’s optimal performance and longevity.

Best Practices for Using Wiring Diagrams

When working with the 2007 Ford F-150 wiring diagrams, ensure you use verified sources like official Ford manuals or trusted online forums. Always cross-reference multiple diagrams to confirm accuracy. Use proper tools such as multimeters and wiring diagram software for precise interpretations. Highlight and label wires in the diagram to track connections easily. Before making changes, test circuits to identify live wires and potential faults. Refer to the color coding system to avoid mismatches. Print or enlarge the PDF for better visibility. Keep all safety precautions in mind, such as disconnecting the battery before starting work. Organize your notes and updates for future reference. Following these practices ensures safe and efficient electrical system maintenance or modifications.

Additional Resources for Advanced Users

For advanced users, exploring specialized forums and communities dedicated to Ford F-150 modifications can provide in-depth insights. Websites like Ford’s official dealership forums or enthusiast platforms often share detailed wiring modifications and custom setups; Additionally, third-party databases like ALLDATA offer comprehensive wiring diagrams tailored for advanced diagnostics. Autozone’s repair guides and online tutorials can also serve as valuable supplements. For complex projects, consulting with professional electrical engineers or experienced mechanics is recommended. Advanced users may also benefit from using electrical diagram software to create custom wiring layouts. Always verify information across multiple sources to ensure accuracy and safety when making modifications.